Build A Closet Organizer That Maximizes Space And Style

You can build a personalized closet organizer that transforms jam-packed shelves into a system tailored to your routine. By mapping out dedicated zones for shoes, folded clothes, and accessories, you’ll keep everything at arm’s reach. Even better, custom designs often cost less than off-the-shelf kits when you source your own panels, brackets, and hardware.
Benefits Of Building A Custom Closet Organizer
Taking charge of every detail—dimensions, finishes, and future tweaks—lets you eliminate wasted space and infuse style that complements your décor. Custom builds empower you to:
Custom Organizer Benefits
| Benefit | Impact | Approximate Cost Savings |
|---|---|---|
| Tailored Dimensions | Eliminate wasted space | $50–$150 per closet |
| Material Choice | Match décor and durability | $30–$80 premium value |
| Future Flexibility | Reconfigure as needs change | Priceless long-term value |
By selecting materials and layout yourself, every inch works for you—keeping costs down and flexibility high.
How Custom Builds Save You Money
Prebuilt kits often sneak in hidden shipping fees, extra tools, and short warranties. When you buy panels, brackets, and hardware separately, you decide where every dollar goes.
Here’s how one weekend project unlocked $120 in savings:
- Source affordable plywood at a local lumberyard to avoid kit markups.
- Use universal adjustable shelf brackets on Miller Waldrop as your reliable support system.
- Repurpose scrap offcuts into shoe cubbies or jewelry trays.
“I tailored every shelf height and never looked at boxed kits again,” says one DIY enthusiast.
Real-World Impact
Custom organizers are driving the market from USD 4.0 billion in 2024 toward USD 8.5 billion by 2035. For deeper insights, explore the Future Market Insights report.
Boost Home Value
A well-designed closet can add 4–6% to resale value—and 75% of buyers list closet quality as a deciding factor. You can leverage Miller Waldrop’s in-store design team to choose finishes that appeal to today’s buyers and suit your style.
Ready to take control of your storage? Book your free in-store design consult at Miller Waldrop and discover the Storage Bench that doubles as seating with hidden compartments.
Before you build, read how to prep your space with Cleaning Out Your Closet Doesn’t Have to Be So Bad.
Planning And Measuring Your Closet Space
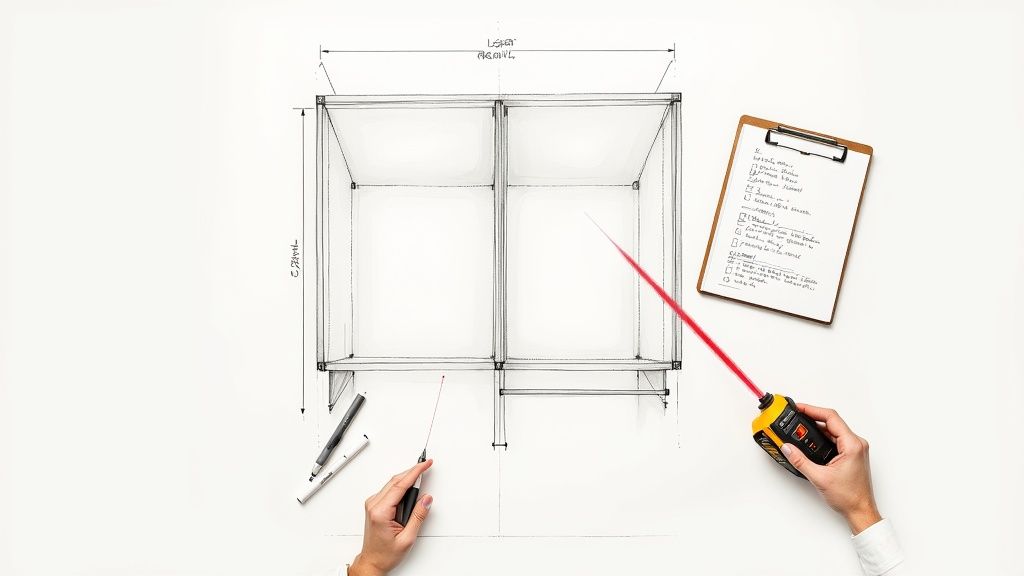
Getting measurements spot-on is your first victory. Sketch wall lengths, vents, and switches before cutting panels—this prevents costly mistakes.
Whether you have a snug 5-foot reach-in or a spacious 10×12 walk-in, here’s how you can nail your layout:
Measurement Tools And Worksheet
Gather these essentials:
- A laser tape measure for pinpoint accuracy (within 1/16 in)
- A steel tape measure for quick cross-checks
- A carpenter’s level to verify horizontals and verticals
- Graph paper and pencil for your rough sketch
- Painter’s tape to mark offsets directly on the wall
Pro Tip: Use painter’s tape to note obstacles as you go.
| Tool | Accuracy | Approximate Cost |
|---|---|---|
| Laser Tape Measure | 0.0625 in | $50–$70 |
| Steel Tape Measure | 1/8 in | $10–$20 |
| Carpenter’s Level | True horizontal | $15–$25 |
| Graph Paper & Pencil | n/a | $0–$5 |
Urban Reach-In Measurement Example
In a 5 ft reach-in, measure width at three heights and note floor-to-ceiling at each point. Sketch vents, switches, and door swings. Dry-fit a paper template to catch surprises early.
Family Walk-In Layout Sketch
For a 10×12 walk-in:
- Map wall lengths and corner angles to scale
- Mark vents, switches, and door swings
- Decide shelf heights for coats, boots, and bins
Learn more in our furniture measurement guide. A typical walk-in holds 8–12 shelf sections—pair your layout with heavy-duty adjustable shelf brackets to support every load.
Drafting Your Cost Sheet
Break expenses into panels, hardware, and finishes:
| Item | Unit Price | Quantity | Total Cost |
|---|---|---|---|
| Plywood Panels | $25 | 4 | $100 |
| Bracket Sets | $5 | 10 | $50 |
| Rod Supports | $8 | 4 | $32 |
| Screws and Anchors | $0.10 | 100 | $10 |
| Total | $192 |
Plan a 10% overage for miscuts and tweaks. With a clear budget sheet, you’ll shop confidently—no last-minute dashes to the store.
Next Steps
Once your measurements and budget are set, empower yourself with a free layout review at Miller Waldrop. Bring sketches and questions so you leave with a finalized parts list and confidence to order every piece.
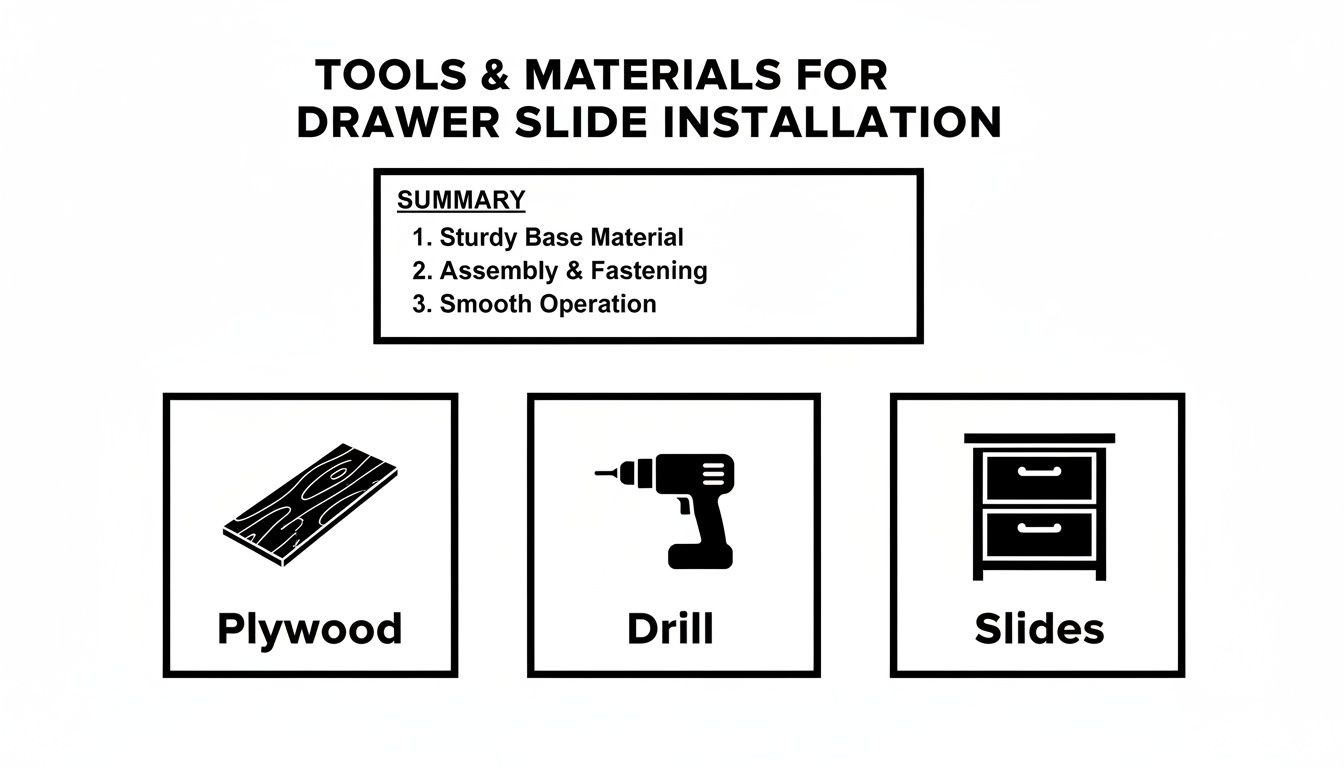
Gather Materials And Tools
A well-prepared workspace keeps your build moving. Lay out:
- Plywood Panels for shelves and dividers
- Drawer Slides for smooth basket and drawer operation
- Shelf Brackets secured into studs for rock-solid shelves
- Cordless Drill for speedy pilot holes and screw driving
- Hand Saw or Circular Saw for precise on-site cuts
- Router Bits to add clean, finished edges
- LED Light Strips to illuminate dark corners without rewiring
Optional upgrades—like a router table or integrated LED modules—can elevate your organizer’s look.
Tool Recommendations
A reliable drill is a game-changer. Brands like DeWalt 20V and Milwaukee M18 offer battery life and torque for every task. Renting a compact table saw or Kreg router bits at your home center can save you 60% versus buying.
“A well-stocked toolkit cuts downtime by up to 30%,” says a veteran installer.
| Item | Purpose | Essential Or Optional |
|---|---|---|
| Plywood Panels | Shelves and dividers | Essential |
| Drawer Slides | Smooth drawer operation | Essential |
| Shelf Brackets | Secure shelving to studs | Essential |
| Cordless Drill | Pilot holes and screws | Essential |
| LED Light Strips | Interior illumination | Optional |
| Router Bits | Edge detailing | Optional |
Shopping List Breakdown
- Have a lumberyard cut 4 plywood panels to your dimensions (~$25 each).
- Grab 10 shelf brackets, drawer slides, and specialty screws.
- Decide on edge detailing—rent or buy router bits accordingly.
- Visit Miller Waldrop Furniture & Decor for LED strips and modular bins.
- Book your free in-store consult to confirm your plan.
By assembling tools and materials first, you’ll shave roughly 20% off build time.
Building For Different Closet Types
Different styles call for different strategies. A reach-in can be done in a weekend; walk-ins often span several weekdays with drawers, shelves, and cubbies.
- Reach-In builds: 1–2 days, $150–$300
- Walk-In systems: 2–4 days, $400–$800
- Pantry setups: 1 day, $120–$250
Closet Type Comparison
| Closet Type | Size Range | Recommended Features | Estimated Cost |
|---|---|---|---|
| Reach-In | 3–6 ft wide | Adjustable shelving | $150–$300 |
| Walk-In | 6–12 ft wide | Mixed drawers and shelves | $400–$800 |
| Pantry | 2–4 ft wide | Pull-out bins | $120–$250 |
North America leads global adoption, with modular shelving and smart organizers driving premium growth. Learn more here.
Panel Cutting Process
On my last reach-in, cutting panels took under three hours with a circular saw and fine-tooth blade. Clamp a straightedge guide against a sacrificial board for splinter-free cuts.
Bracket Installation
Most studs are 16 inches on center—perfect for heavy-duty brackets. If you anchor to drywall, choose toggles rated for 50 lbs+. Always pilot holes and level each bracket before tightening.
Drawer Track Alignment
Precision here makes or breaks smooth glides. Aim for 1/16 in accuracy, mark slide positions with a speed square, and level front-to-back before final screws.
Adjustable Shelves For Reach-In
Adjustable shelves let you mix boots, bins, and jeans. Pre-drill holes at 1 in increments for shelf pins and clear away sawdust so pins slip in smoothly. Try the Adjustable Shelf Brackets as your reliable support.
Cubby Systems For Walk-In
A 12-cubby system organizes shoes, bags, and gear in about two hours for roughly $200. Use 1 in-thick plywood dividers, secure with wood glue and corner braces, and add labeled fabric bins for smaller items.
Modular Variations And Budget Alternatives
Slotted standards and brackets let you reconfigure shelving without new holes. Mix off-the-shelf metal standards with DIY panels to trim costs by 30%. Repurpose stair treads or old boards, and add L-brackets from your home center as budget-friendly supports.
Book your free layout review at Miller Waldrop Furniture & Decor to refine panel thickness, bracket selection, and finish options.
Component Cost Breakdown
| Component | Unit Price | Quantity | Total |
|---|---|---|---|
| Plywood Panels | $25 | 4 | $100 |
| Shelf Brackets | $5 | 10 | $50 |
| Drawer Slides | $12 | 4 | $48 |
| Screws and Anchors | $0.10 | 100 | $10 |
| Total | $208 |
Dry Fit Checklists
Perform a dry fit to catch alignment issues before screwing anything down:
- Confirm shelf levels front to back.
- Test drawers for smooth action.
- Verify bracket positions align with studs.
- Inspect panel seams for flush connections.
Next Steps
When your dry fit checks out, lock in your in-store session at Miller Waldrop. You’ll walk away with a complete parts list and the confidence to start cutting.
Finishing Styling And Maintenance Tips
A quality finish protects panels from moisture and daily wear. Here’s how you can seal and style your build:
Choosing Paint And Stain
- Start with a moisture-blocking primer.
- Use water-resistant paint for easy cleaning.
- Apply an oil-based stain to deepen wood grain and seal surfaces.
- Select low-VOC options to keep air fresh.
Picking Hardware And Accessories
Select hardware that ties your closet to your home’s style. Matte black or brushed nickel works for modern spaces; antiqued brass suits classic vibes.
- Pull-out baskets for shoes and daily essentials.
- Color-coded bins that cut visual clutter by 80%.
- Decorative hooks for belts, scarves, and jewelry.
Explore decor ideas in How To Decorate Shelves In Any Room. Then choose LED strips and bins at Miller Waldrop Furniture & Decor.
Seasonal Maintenance Checklist
Every three months:
- Tighten screws and brackets.
- Replace drawer liners.
- Inspect shelves for sagging.
- Lubricate slides with dry silicone spray.
- Wipe surfaces with a gentle cleaner.
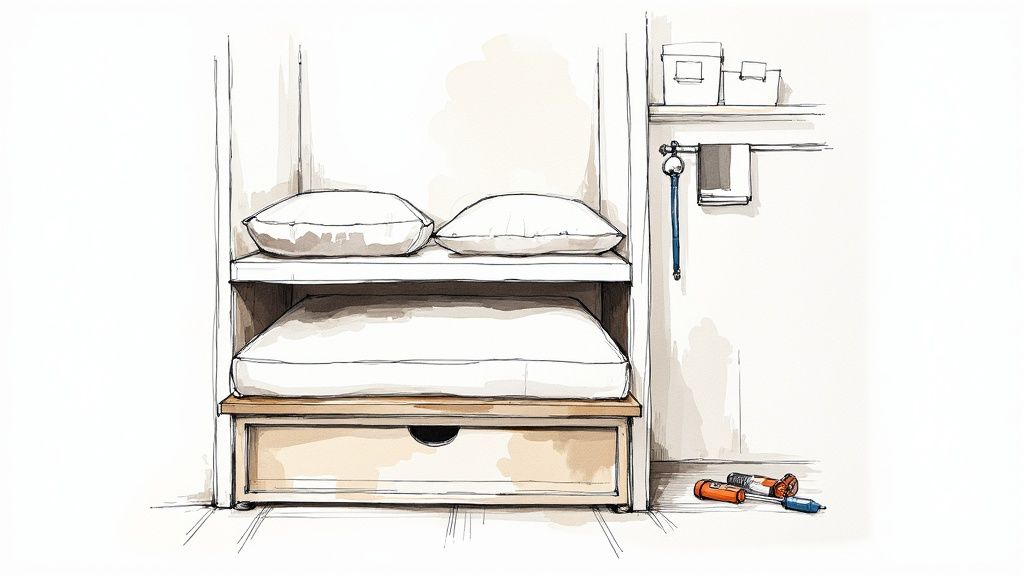
Completing Your Custom Organizer
Finalize your look with help from Miller Waldrop’s experts. Browse the Storage Bench to add seating and hidden storage. Place a hamper station near lower shelves to keep laundry off the floor.
Drop by for a free design consultation and get the hardware, lighting, and finishes you need to win the day.
Advanced Styling Ideas
- Frameless LED mirror panels to expand light and space.
- Label holders on bins for family-friendly organization.
- Velvet drawer liners for jewelry protection.
- Coordinated fabric bins to hide clutter.
Mount a slim full-length mirror on the back wall—function and style rolled into one.
Troubleshooting And Hiring A Professional
Even experienced DIYers can hit snags—tilting shelves, misaligned panels, or hidden wiring. These fixes can save your build:
DIY Fixes For Misaligned Shelves
- Slip thin shims behind brackets to compensate for wall irregularities.
- Upgrade to metal toggle anchors rated 100+ lbs.
- Use a deep-scan stud finder to pinpoint framing.
“Adding shims cut my shelf-adjustment time in half,” says a repeat installer.
Fixing Uneven Walls
- Scan low spots with a laser level.
- Apply drywall compound, sand smooth, then test-fit panels.
Comparing DIY Versus Professional Rates
| Service Type | Hourly Rate | Typical Time | Potential Rework Cost |
|---|---|---|---|
| DIY Troubleshooting | $0 (tools owned) | 2–4 hrs | $20–$50 extra parts |
| Contractor Installation | $50–$75/hr | 1–2 hrs | Minimal |
| Specialist Electrician | $65–$85/hr | 1–3 hrs | $150–$300 |
Addressing Wiring Challenges
Always use a non-contact tester before drilling. If wiring runs through your walls, enlist a licensed electrician.
Signs You Need Professional Help
- Live wires behind panels
- Irregular stud spacing
- Plans for 50 lbs+ per shelf
- Drywall cracks around heavy brackets
Miller Waldrop’s contractor network connects you with vetted installers for a single-visit solution.
Preparing Your Project Details
- Photograph problem areas and wiring.
- Note wall type and stud spacing.
- Sketch bracket layouts with measurements.
- List tools and anchors you’ve tried.
Clear documentation can reduce professional labor by 30%.
Ready to combine your DIY drive with expert support? Book a free consult at Miller Waldrop and discover heavy-duty anchors, stud finders, and adjustable shelf brackets to finish your project flawlessly.
FAQ
What Is the Fastest Way to Measure a Closet Accurately
Use a laser tape measure to capture wall-to-wall, floor-to-ceiling, and depth dimensions in seconds. Record each reading on graph paper or our downloadable worksheet, marking vents and switch plates. This approach cuts errors by 50%—and you can verify your plan with a free in-store consult at Miller Waldrop.
How Do I Add Lighting in a DIY Closet Build
Plan wiring before panels go up. Low-voltage LED strips tucked under each shelf deliver even, shadow-free light. Route cables through pre-drilled holes and secure with clear clips for a professional finish.
What Are Budget-Friendly Material Options
MDF panels offer a smooth, paint-ready surface at a fraction of hardwood’s cost. Pair them with standard drawer slides and repurposed hardware from old furniture. Later, upgrade to premium brackets for added strength and style without a hefty upfront expense.
When Is It Worth Hiring a Pro
If you’re tackling load-bearing walls, intricate moldings, or hidden wiring, professional help can prevent costly mistakes. Local installers charge $50–$75/hr, and avoiding a single $200+ error makes it a smart investment. Booking through Miller Waldrop’s network ensures vetted experts and a stress-free finish.
Ready To Fine-Tune Your Custom Organizer? Empower your project with a free in-store design consult and explore quality panels, bracket sets, and lighting solutions today: Miller Waldrop Furniture & Decor