How to Clean Your Sofa with a Steam Cleaner: A Step-by-Step Guide
Ready to give your sofa a fresh start with a steam cleaner? Your strategy is simple but powerful: vacuum meticulously, decode the fabric's cleaning code, and apply high-temperature steam. By working in long, overlapping strokes, you'll have the power to lift deep-seated dirt and eliminate germs, all without harsh chemicals. When you master this technique, you can completely revitalize your upholstery, banishing odors and allergens for good.
Your Guide to a Fresh and Revitalized Sofa
Your sofa is the hero of your living room. It's the stage for movie nights, the cozy corner for reading, and the best spot for an afternoon nap. But with all that action, it inevitably collects dust, allergens, and the occasional coffee spill.
This guide is designed to give you the confidence and know-how to steam clean your sofa like a seasoned pro. Think of it as unlocking a new skill: the ability to restore your furniture's beauty and cultivate a healthier, more inviting space for your family.
Steam cleaning is your secret weapon for a truly deep, chemical-free clean. It works by sending hot vapor deep into fabric fibers, powerfully breaking down dirt and sanitizing the surface. It’s a game-changer for a few key reasons:
- Eliminates Germs and Allergens: You can harness high-temperature steam to wipe out up to 99.9% of common household bacteria and dust mites, without leaving behind any chemical residue.
- Neutralizes Odors: Instead of just masking smells, steam gets to the source, neutralizing those lingering pet or food odors for good.
- Lifts Out Stubborn Dirt: It loosens the embedded grime and dust that your vacuum can’t reach, visibly brightening your sofa's fabric.
It's clear that homeowners are embracing healthier cleaning methods. The global steam cleaner market is projected to reach an impressive USD 7.1 billion by 2030, signaling a major shift toward chemical-free home care.
This guide will empower you to tackle this project with skill. Of course, for deeply set stains, delicate fabrics, or just a really tough cleaning challenge, calling in professional furniture cleaning services is a smart move.
Your mission isn't just to clean a sofa—it's to restore a centerpiece of your home. With the right technique, you can lift away months of wear and tear, revealing the fresh, comfortable furniture you first fell in love with.
Ultimately, learning this skill puts you in control of your home's cleanliness and comfort. And when you're ready to find that next perfect piece, you'll have all the knowledge you need to choose from our curated selection of high-quality sofas and sectionals designed for lasting beauty and easy care.
Understanding Your Sofa's Cleaning Codes
Before you fire up that steam cleaner, it's time for a little detective work. Your sofa holds a crucial secret on a small tag, usually tucked under a cushion or along a seam. This tag contains the cleaning code—the key to safely maintaining your furniture.
Ignoring this tag is the single most costly mistake you can make. It’s not a suggestion; it’s the manufacturer's rulebook for your specific fabric. You wouldn’t put a wool sweater in a hot dryer, and the same logic applies here. Following these codes is the first step in protecting your investment.
Decoding the Upholstery Alphabet
Let's break down what those letters on the tag mean. Each one is a direct instruction on how to proceed—or when to stop.
- W is for Water-Based: If you see a 'W,' you have the green light. This means your sofa's fabric is compatible with water-based cleaners, making it a perfect candidate for steam cleaning.
- S is for Solvents Only: An 'S' code is a hard stop. This fabric demands a dry solvent cleaner. Using water or steam will lead to disaster, often causing permanent water rings, shrinkage, or color bleeding.
- W/S is for Both: This code offers flexibility, meaning either water-based or solvent cleaners are acceptable. Even with this code, you should proceed with caution and always perform a spot test first.
- X is for Vacuum Only: An 'X' is your signal to put the steamer away. This fabric is extremely delicate and should only be vacuumed or gently brushed. Any liquid, whether solvent or water, will likely cause damage.
Getting this right is everything. The professional cleaning industry is a USD 4.5 billion market, and a significant portion of that comes from fixing DIY jobs where these codes were ignored. To become an expert on how different fabrics behave, this guide on everything you need to know about upholstery materials is an invaluable resource.
This flowchart maps out your decision-making process. It’s the first, most critical step you need to take.
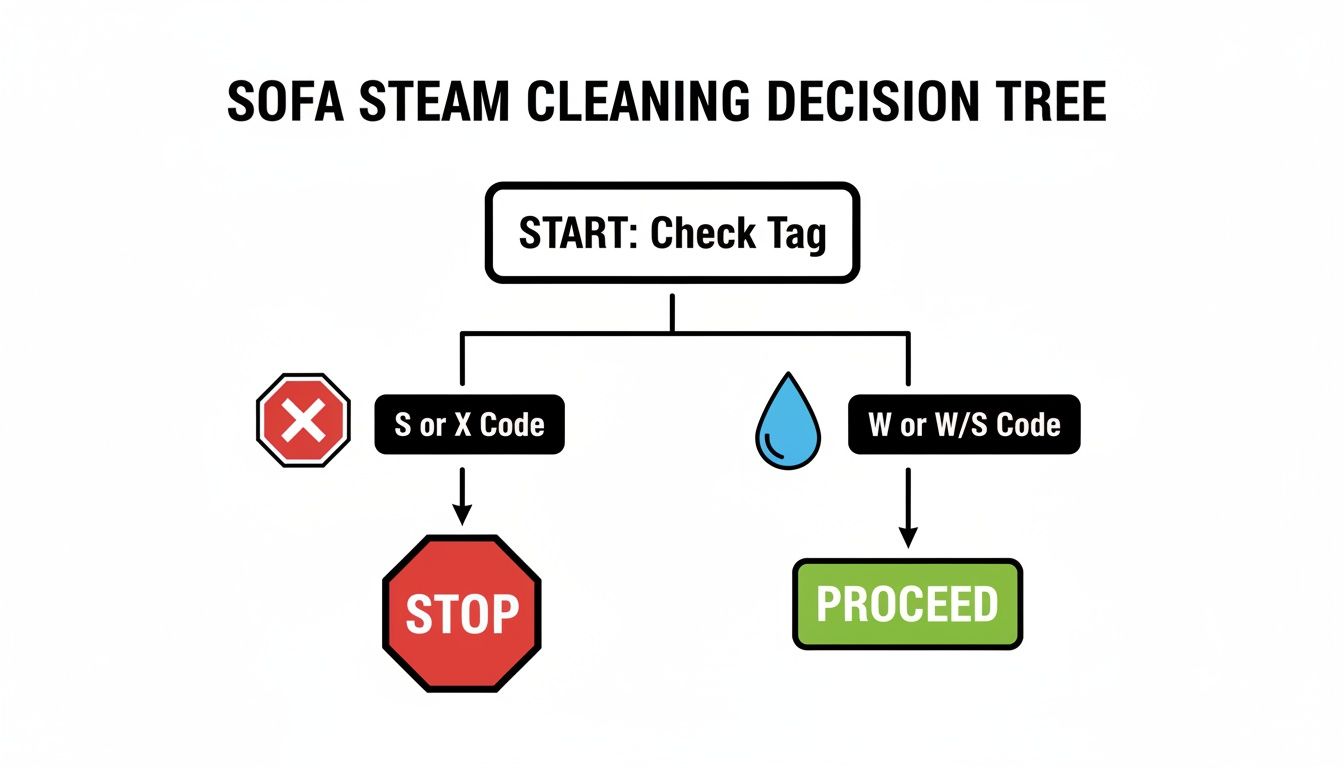
As you can see, if your sofa has an 'S' or 'X' tag, your steam cleaning mission ends here. It’s simply not worth the risk.
The Essential Spot Test
Even with a 'W' or 'W/S' code, this final safety check is non-negotiable. A spot test takes just two minutes but can save you from a world of regret.
Find a small, hidden area to work on—like the back of the skirt, an inside seam, or a spot always covered by a cushion. Apply a quick burst of steam, blot it with a clean white towel, and let it air dry completely.
Once dry, inspect the area for any changes. Did any color transfer to your towel? Has the fabric's texture changed? Do you see any water spotting? If it looks exactly as it did before, you are cleared for takeoff.
Preparing Your Sofa for a Deep Clean
You've confirmed your sofa can handle the heat. Fantastic. Now for the prep work—the step that separates a decent clean from a truly professional one. Skipping this is like painting a wall without sanding it first; you simply won't achieve that flawless, polished result you're aiming for.
Before you even fill the steam cleaner, you must vacuum. And not just a quick once-over. This is a deep, thorough vacuuming designed to capture every last crumb, dust bunny, and strand of pet hair. Your steam cleaner is a powerhouse against grime, but it can’t work its magic if it’s pushing around loose debris.
Go Beyond the Surface Vacuum
To truly prepare your sofa, you'll need to deploy your vacuum's attachments. This is where the real cleaning happens.
- Crevice Tool: Plunge this tool deep into every seam, corner, and cushion gap. You'll be amazed (and maybe a little horrified) at what it pulls out.
- Upholstery Attachment: Glide this over every flat surface—the cushions, back, and arms. It's engineered to lift fine dust and stubborn pet hair that a standard vacuum head misses.
- Brush Attachment: For textured fabrics, a gentle pass with the brush attachment will help loosen dirt that's clinging to the fibers.
Why is this so critical? Steaming over dry soil essentially creates mud. This not only makes stains harder to remove but can also leave behind unsightly streaks. Remember, your tools must match the material. For delicate surfaces like leather, you'll need a different approach; you can learn how to properly care for and protect your leather furniture with specialized techniques.
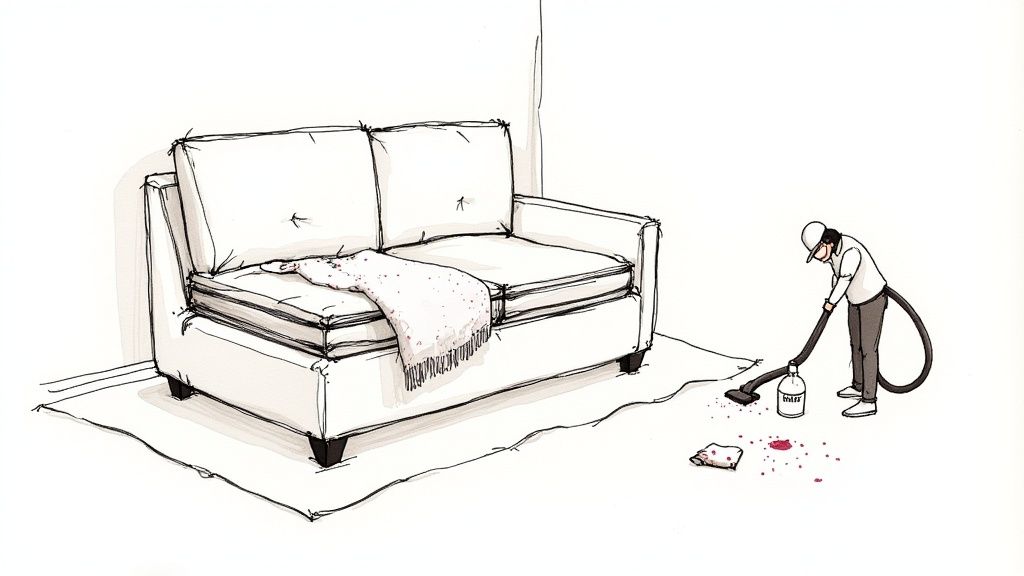
Pre-Treating Stubborn Stains
Now, let's tackle those specific spots—the coffee ring, the wine splash, the mystery smudge. Hitting these with a pre-treatment before steaming gives you a much greater chance of removing them completely.
Think of it this way: pre-treating allows a targeted cleaner to do the heavy lifting, breaking down the stain so you don't have to over-saturate the area with steam. This is your key to avoiding watermarks and being gentle on your fabric.
Find a high-quality, water-based upholstery cleaner that is safe for your sofa’s fabric code. Lightly spritz the stain—don't drench it. Let the solution work its magic for 5-10 minutes, then gently blot the spot with a clean, white microfiber cloth. Remember to blot, not rub. Rubbing can drive the stain deeper into the fabric, making your job much harder.
Finally, prepare your workspace. Move any coffee tables out of the way and lay down some old towels or a drop cloth around the sofa. This protects your floors from stray drips and allows you to focus completely on bringing your sofa back to life.
Getting to Grips with Your Steam Cleaner
Your sofa is prepped, and you're ready for the main event. This is where technique becomes your superpower. It's not about blasting dirt with steam; it's about wielding your steam cleaner with finesse to achieve a deep clean without damaging your furniture.
First, let's select the right tools for the job. Your steam cleaner likely came with several attachments, and choosing the right one is crucial for success.
- Large Upholstery Tool: This will be your workhorse. It’s the wide, flat attachment designed to cover main surfaces like cushions and backrests quickly and evenly.
- Crevice Tool: For those tight spots where crumbs and dust hide, the long, narrow crevice tool is your best friend for reaching into seams, button tufts, and the gaps between the frame and cushions.
- Detail Nozzle or Brush: For stubborn, pre-treated stains or highly textured fabrics, the smaller brush attachment gives you the extra scrubbing power needed to lift ground-in grime.
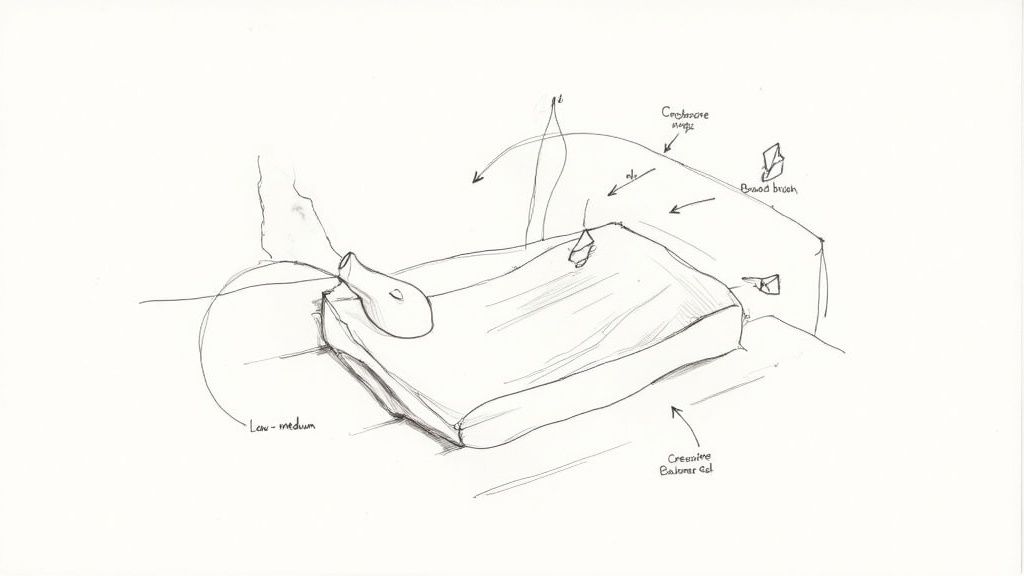
Finding That "Just Right" Steam Setting
Every fabric is unique, so you can't just set the steam to maximum and hope for the best. Your goal is to find the perfect balance—enough power to sanitize and lift dirt, but not so much that you damage the fibers or soak the sofa.
Always start on the lowest steam setting. Go back to the hidden spot you used for your initial test. If the low setting is effective, there's no need to increase it. You can cautiously dial it up for heavily soiled areas, but remember, more steam isn't always better. Over-saturating the fabric can lead to watermarks, excessively long drying times, and even mildew.
The secret to a streak-free, professional finish lies in your technique. This isn't a race. Approach it like you're painting a wall—smooth, consistent strokes are essential for a uniform result.
Your Cleaning Motion Matters
With the right attachment and steam setting, you're ready to begin. The golden rule is to work from top to bottom. This simple strategy prevents dirty water from dripping onto sections you’ve already cleaned.
Use long, straight, overlapping strokes. Move the attachment slowly and steadily across the fabric, ensuring each new pass slightly covers the last one, just like mowing a lawn. This methodical approach is your best defense against missed spots and streaks caused by haphazard, circular motions. For a deeper dive into expert techniques, this practical guide to steam clean upholstery is an excellent resource.
Whatever you do, don't let the steamer linger in one spot for too long. That’s a surefire way to create water spots and a soggy mess. Keep the tool in constant motion. For even more powerful cleaning strategies, check out our guide on the best way to clean upholstery.
Having a versatile machine makes all the difference. A quality tool like a Handheld Upholstery Steam Cleaner gives you the power and precision to tackle both large surfaces and delicate details, equipping you with everything you need to bring your furniture back to life.
Ensuring a Perfect Finish After Cleaning
You've put in the work, and your sofa looks a hundred times better. But don't sit down just yet—the mission isn't quite complete. This final phase of proper drying and after-care is what elevates a good result to a great one. Skipping it could undo all your hard work, leading to mildew or fabric that feels stiff and crunchy.
Good airflow is your top priority now. A damp sofa in a stuffy, closed-off room is the perfect breeding ground for that dreaded musty smell. You need to create an environment that encourages moisture to evaporate as quickly as possible. It's time to let your sofa breathe after its deep clean.
Accelerating the Drying Process
Your main objective is to get the fabric completely dry within a few hours. The longer it stays damp, the higher the risk of something going wrong.
Here’s how you can take control of the drying process:
- Open the Windows: The simplest trick in the book. If the weather permits, letting in a fresh breeze works wonders.
- Bring in the Fans: This is a pro-level move. Point a couple of box fans or oscillating fans directly at the sofa to create constant airflow that whisks moisture away.
- Use a Dehumidifier: If you live in a humid climate, a dehumidifier is your best ally. It will actively pull moisture from the air, dramatically reducing drying time.
Patience is crucial here. A sofa can take anywhere from 2 to 6 hours to dry completely after you clean the sofa with a steam cleaner. Whatever you do, resist the urge to sit on it while it's still damp. This can flatten the fibers and leave permanent dents in the cushions.
Your hard work deserves a perfect finish. Proper drying isn't just a final task—it's the step that locks in the freshness, prevents secondary issues like mildew, and ensures your sofa is truly ready for your family to enjoy.
Restoring Your Sofa's Original Texture
Once the sofa is bone-dry to the touch, you might notice the fabric feels a little stiff or looks slightly matted. Don't worry; this is completely normal, especially for fabrics like microfiber or chenille. The final touch is to "groom" the fibers back to their original glory.
Take a soft-bristled upholstery brush and gently sweep it across the entire sofa, brushing in the same direction as the fabric's natural nap. This simple action lifts and fluffs the fibers, removing any marks left by the cleaning tool and restoring that soft, inviting feel.
And that's it—mission accomplished. You've successfully revived your sofa. You now possess the skills to not only clean your furniture but to ensure it looks impeccable from start to finish. If you're feeling inspired to find the next perfect piece for your home, explore our beautiful collection of sofas and sectionals designed for comfort and lasting style.
Answering Your Top Sofa Steam Cleaning Questions
Even with a solid plan, a few questions can pop up before you start. Let's tackle some of the most common uncertainties people have when they clean their sofa with a steam cleaner. Arming yourself with these answers will give you the confidence to execute the job flawlessly.
Think of this as your quick-reference guide for handling those "what if" moments.
Can I Use Tap Water in My Steam Cleaner?
While you technically can, it's a choice you'll likely regret. Tap water contains minerals like calcium and magnesium that create limescale buildup inside your steam cleaner, reducing its performance over time.
Worse, those same minerals can leave a chalky, white residue on your sofa's fabric as the water evaporates—a real problem on darker materials. By choosing distilled or demineralized water, you protect your machine and ensure you’re leaving behind nothing but a deep, spot-free clean.
How Often Should I Be Steam Cleaning My Sofa?
This truly depends on your lifestyle. For most homes, a thorough steam clean every 12 to 18 months is a great rhythm for maintaining freshness and condition.
However, your home might call for a more frequent schedule. You can take charge and clean more often if your household includes:
- Pets: Fur, dander, and pet odors build up quickly. Cleaning every 6 months can make a huge difference.
- Young Children: From juice spills to sticky fingerprints, kids put furniture to the test. More frequent cleaning helps you stay ahead of the messes.
- Allergy Sufferers: Steam is a powerful tool for killing dust mites and removing allergens. Cleaning every 6 to 9 months can significantly improve your indoor air quality.
This schedule is for deep cleaning. Always be ready to spot-treat spills and stains as soon as they happen.
What If My Sofa Feels Too Wet After Cleaning?
A little dampness is normal, but your sofa should never feel soaked. If it does, you likely used too much steam or moved too slowly over an area. Don't worry—you have the power to fix it.
First, pass the cleaner's nozzle over the soggy spots again, but this time, do not press the steam trigger. If your machine has a suction-only function, use it to pull out as much excess moisture as possible.
Next, take clean, dry, white towels and press down firmly to blot up even more water. The final step is to maximize airflow. Point fans directly at the sofa and, if you have one, run a dehumidifier in the room to accelerate the drying process and prevent musty odors from developing.
It's common to notice a faint, earthy smell right after cleaning as deep-down dirt is released. This scent should disappear completely as the fabric dries. If a musty smell lingers after it's dry, that’s a clear sign it got too wet.
Next time, simply remember to use quicker, lighter passes and start on a lower steam setting. It's always easier to do a second light pass than to undo a single heavy-handed one.
At Miller Waldrop Furniture & Decor, we believe your home should be a comfortable, well-loved sanctuary. Equipping you with the practical knowledge to care for your furniture is just one way we help you create a home you’re truly proud of. When you’re ready to choose your next living room hero, we invite you to explore our collection of high-quality sofas designed for the rigors of real life.