


Barn Door Installation: A Step-by-Step Guide

You're usually in one of two spots when a barn door installation moves from idea to action. You've got a doorway where a swinging door keeps eating up floor space, or you've got a blank wall and a strong suspicion that a barn door would solve the traffic flow and clean up the look of the room at the same time.
That instinct is often right.
A barn door can make a pantry easier to access, turn a laundry area into something cleaner-looking, or give a bedroom or office a strong focal point. But the box instructions tend to make every wall look flat, every opening look square, and every framing layout look cooperative. Real houses in West Texas and Southeastern New Mexico don't always play that nice. You'll run into drywall over masonry, trim that isn't consistent, studs that don't line up where you need them, and floors that reveal every small mistake.
The good news is that this project is absolutely doable for a careful homeowner. The trick is knowing which parts need patience and which parts just need the right hardware and a straight answer.
Planning Your Perfect Barn Door Project
The first decision isn't finish, color, or hardware style. It's what problem the door is solving.
If you need a clean divider for a pantry, laundry room, hallway opening, or flexible living space, a barn door is often a smart move. If you need strong privacy for a bathroom, bedroom, or home office where sound matters, you need to think harder before buying anything.
Barn doors slide. They don't seal like a hinged door. Home Depot's installation guidance notes about 1 inch between the door and wall and about 1/2 inch between the bottom and floor, which is why light, sound, and odors pass more easily than they would with a standard swing door in privacy-sensitive rooms, as noted in Home Depot's barn door installation guide.
Match the door to the room
For everyday use, I break the decision down like this:
- Pantry or laundry room: Barn doors work well. You get space savings and easy access.
- Closet or room divider: Also a good fit, especially where a swing door blocks furniture placement.
- Bedroom or bathroom: Use caution. They look great, but they won't give the same visual or acoustic separation as a conventional door.
- Home office: Fine for style and casual separation. Not ideal if you need quiet for calls.
That's where style has to answer to function. A lot of homeowners fall in love with the look first, then get frustrated when the door behaves exactly like a barn door behaves.
Pick the right layout
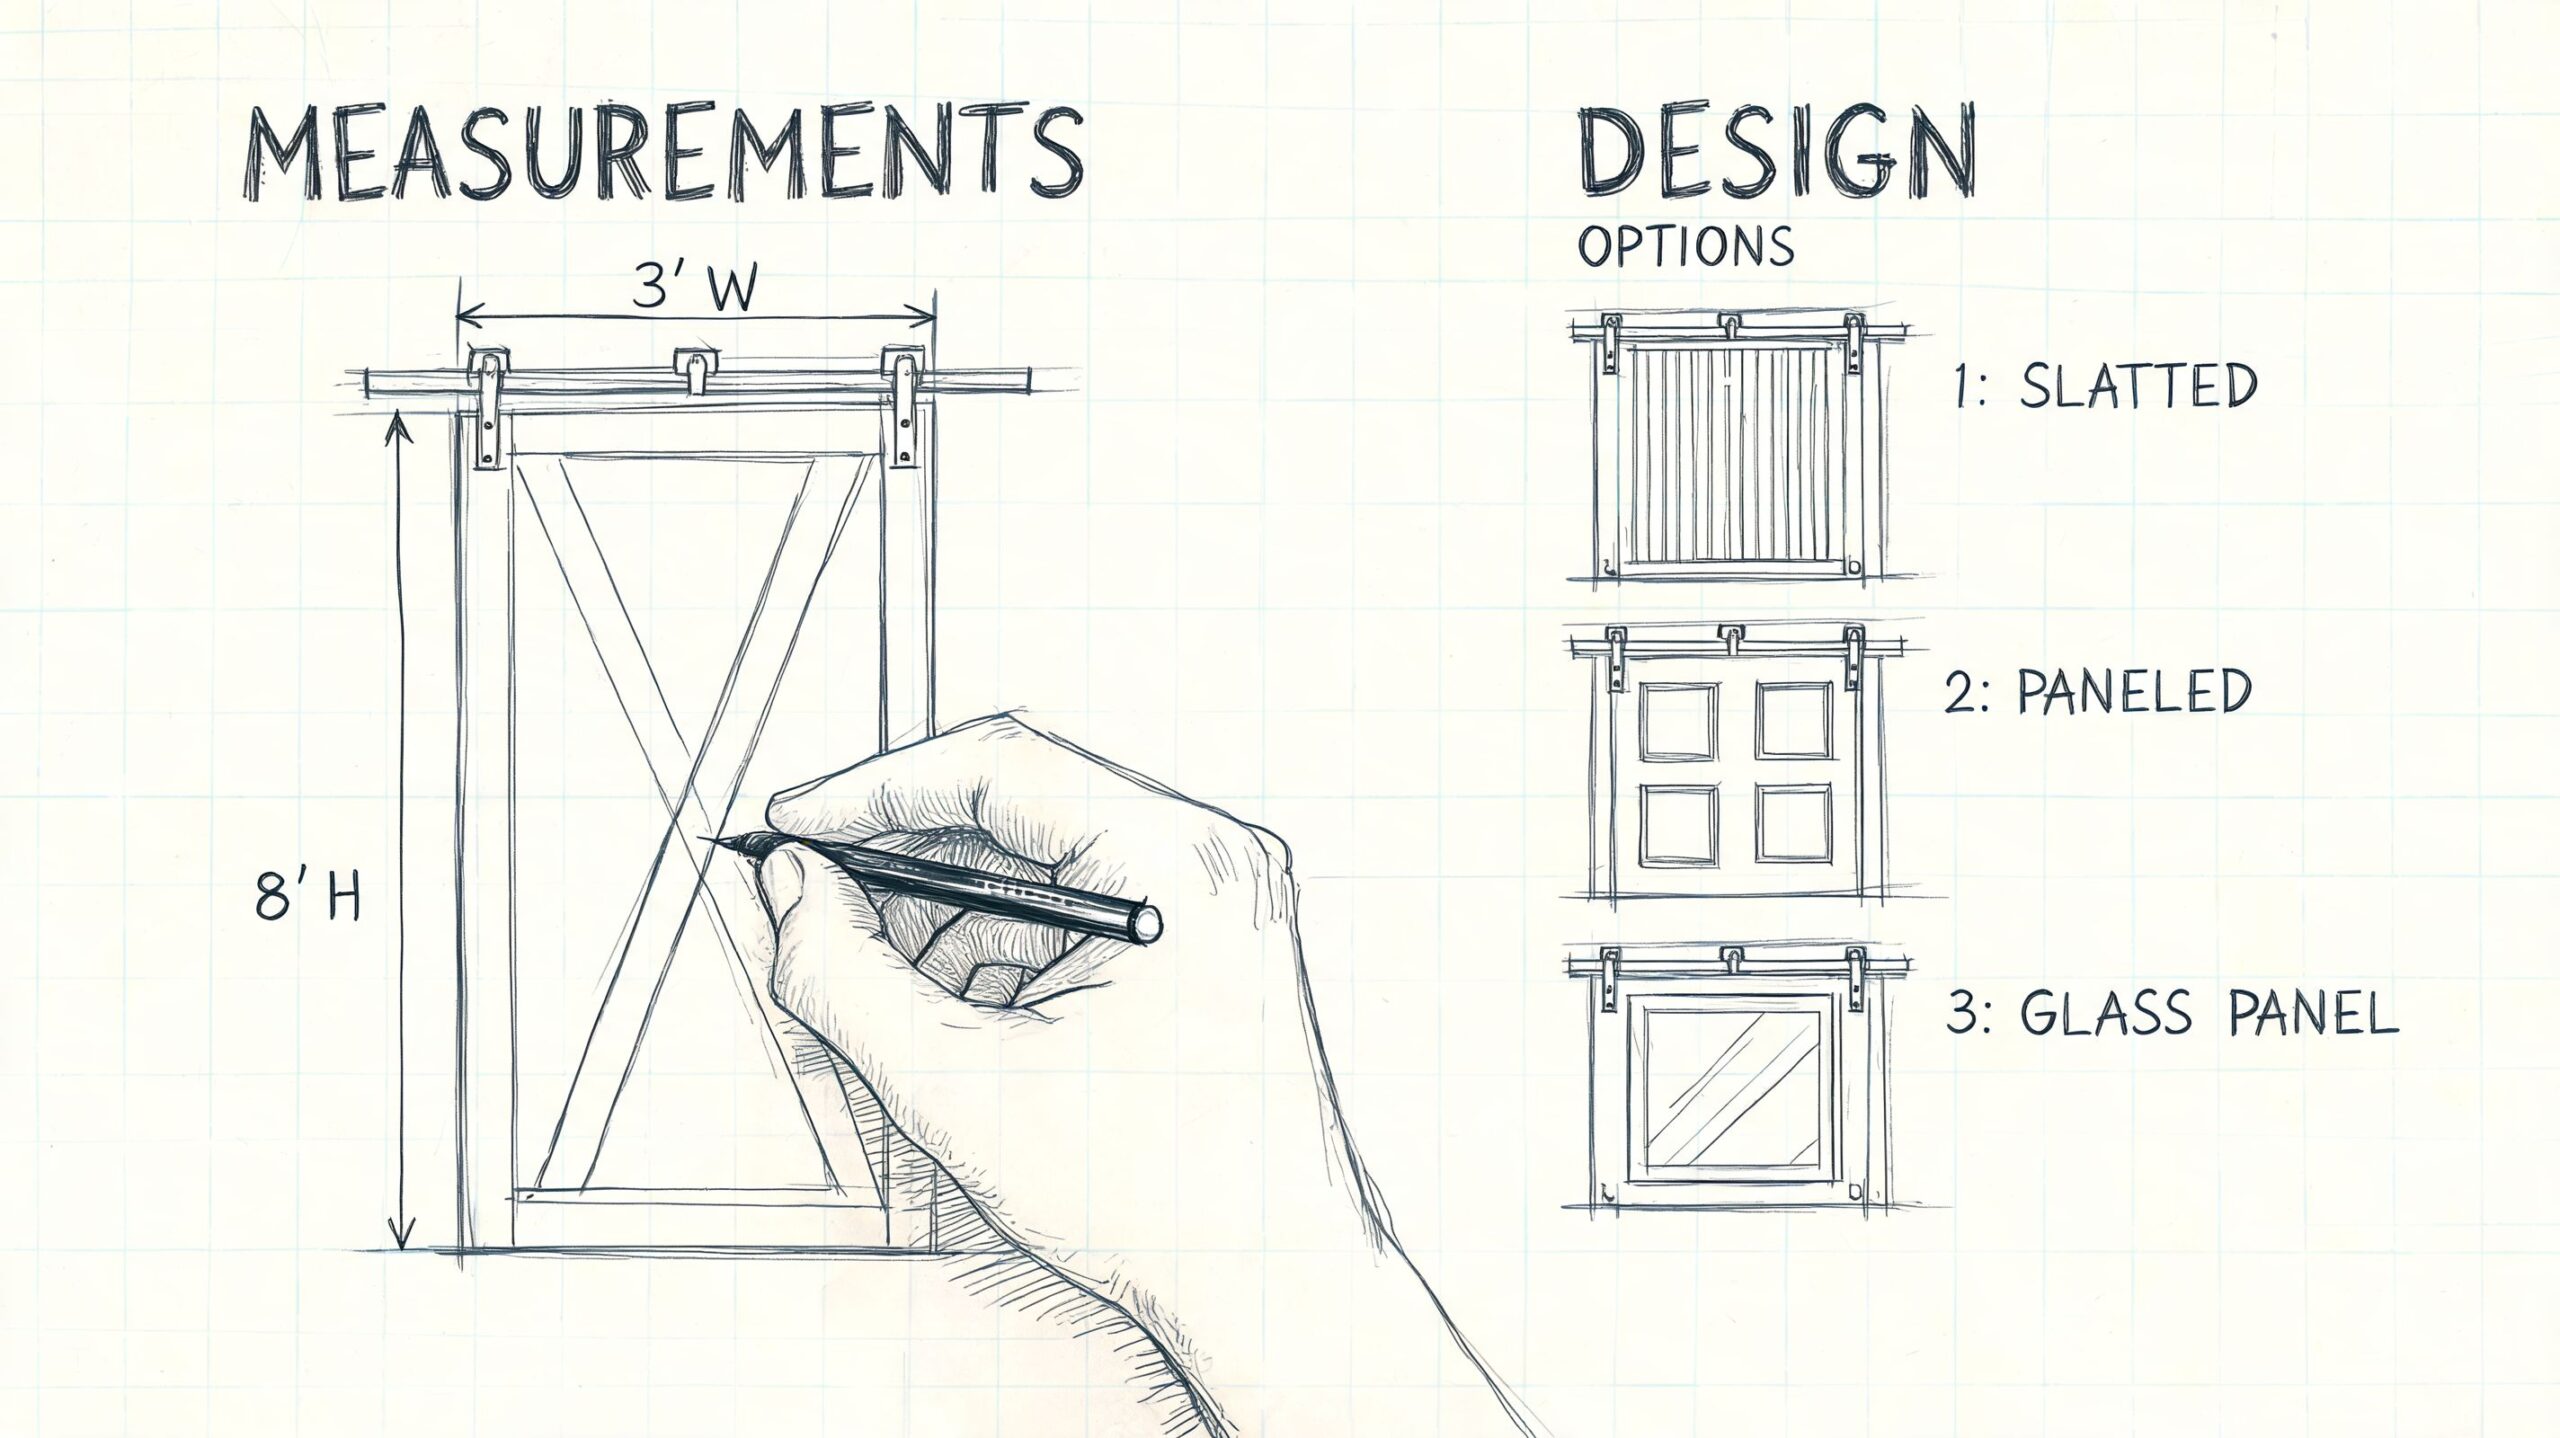
Single doors are the simplest install. They work when you have enough blank wall on one side of the opening for the panel to slide fully open.
Double doors make sense for wider openings or where you want symmetry. Bypass systems help when wall space is limited and one door can slide in front of another. Those are useful in tighter remodels, but they add complexity, so they're not where I'd start on a first install unless the room demands it.
If you're still narrowing down styles, Wilcox Door Service Inc. solutions are useful to review because they show the range between decorative and more practical barn-style setups. That helps people decide quickly whether they want the door to be a statement piece, a room divider, or a quieter architectural feature.
Get the measurement right before you shop
This is the make-or-break step. The door must overlap the opening. If you size it to match the opening, you'll end up with visible gaps and a result that looks wrong even if the hardware is mounted perfectly.
According to Viba Hardware's measuring guidance, a common rule is to measure the interior opening and add 2 inches per side for standard coverage. For an 80-inch-high by 36-inch-wide opening, that means a door that's at least 82 inches high and 40 inches wide.
Practical rule: Don't order the door based on the old door slab. Measure the actual opening, check the trim, and size for coverage.
In older homes around Lubbock, Hobbs, and Ruidoso Downs, trim can vary from side to side. Measure width in more than one place. Check whether the casing sticks out unevenly. If the door needs to cover trim, account for that before you buy.
If you're using the door to break up a larger living space, a barn door room divider can help you think beyond a basic doorway and toward how the whole room will function when the panel is open and when it's closed.
Gathering Your Hardware and Tools
A smooth barn door installation starts with matching the hardware to the wall, the door weight, and the look you want. Don't treat hardware like an accessory. It's the working part of the whole project.
The good news is that the market has shifted toward more installer-friendly systems. Grand View Research reports that the box rail hardware segment is expected to hold the largest market share at 33.7% in 2026, largely because of its simpler installation process, as cited in the North America metallic barn doors market report.
Choosing a hardware style
Here's the short version of what tends to work best:
- Top-mount strap hardware: This is the classic look. It's visible, decorative, and works well in rustic, industrial, or farmhouse spaces.
- Face-mount roller systems: Cleaner and a little more modern. Good when you want the hardware to show, but not dominate the wall.
- Box rail systems: More clean-lined and often easier to install cleanly. Good for homeowners who want less fuss and a tidier profile.
If you're pairing the new door with other built-ins or trim work nearby, it helps to think about the whole wall, not just the opening. Matching wood tones, shelf finishes, and cabinet details matter more than people expect. For adjacent millwork ideas, drawer-building details for cabinets can help you keep the project visually consistent.
Barn Door Installation Essentials
| Category | Item | Notes |
|---|---|---|
| Door and track | Barn door slab | Size it for overlap, not exact opening size |
| Door and track | Track kit | Confirm weight rating and wall clearance requirements |
| Structural support | Header or backer board | Useful when studs don't line up with track holes |
| Fastening | Lag screws and anchors | Use the correct fasteners for your wall type |
| Layout | Tape measure | Check opening width, trim, and clear slide path |
| Layout | Pencil and level | Layout errors show up fast on a sliding door |
| Layout | Stud finder | Critical on framed walls before drilling |
| Drilling | Drill and pilot bits | Pilot holes help keep lag screws straight |
| Drilling | Socket or impact driver | Needed for tightening lag hardware |
| Safety and finish | Safety glasses | Drilling overhead throws debris |
| Safety and finish | Floor guide and stops | Keeps the door controlled in daily use |
The gear that saves headaches
There are tools you can improvise, and there are tools that save the job.
A good spirit level matters. So does a reliable stud finder. On textured walls or older drywall, I like confirming stud locations more than once before drilling. A laser level is helpful, especially on longer tracks, but a standard level still gets it done if you work carefully.
Buy the fasteners for your actual wall, not the wall the instructions assume you have.
That matters a lot in this region. Some homes have straightforward stud walls. Others have layers of patching, plaster repairs, or masonry conditions that call for a different approach.
Preparing the Wall and Mounting the Track
Barn door installation demands precision. A crooked track won't forgive you later, and weak attachment points won't get stronger with time.
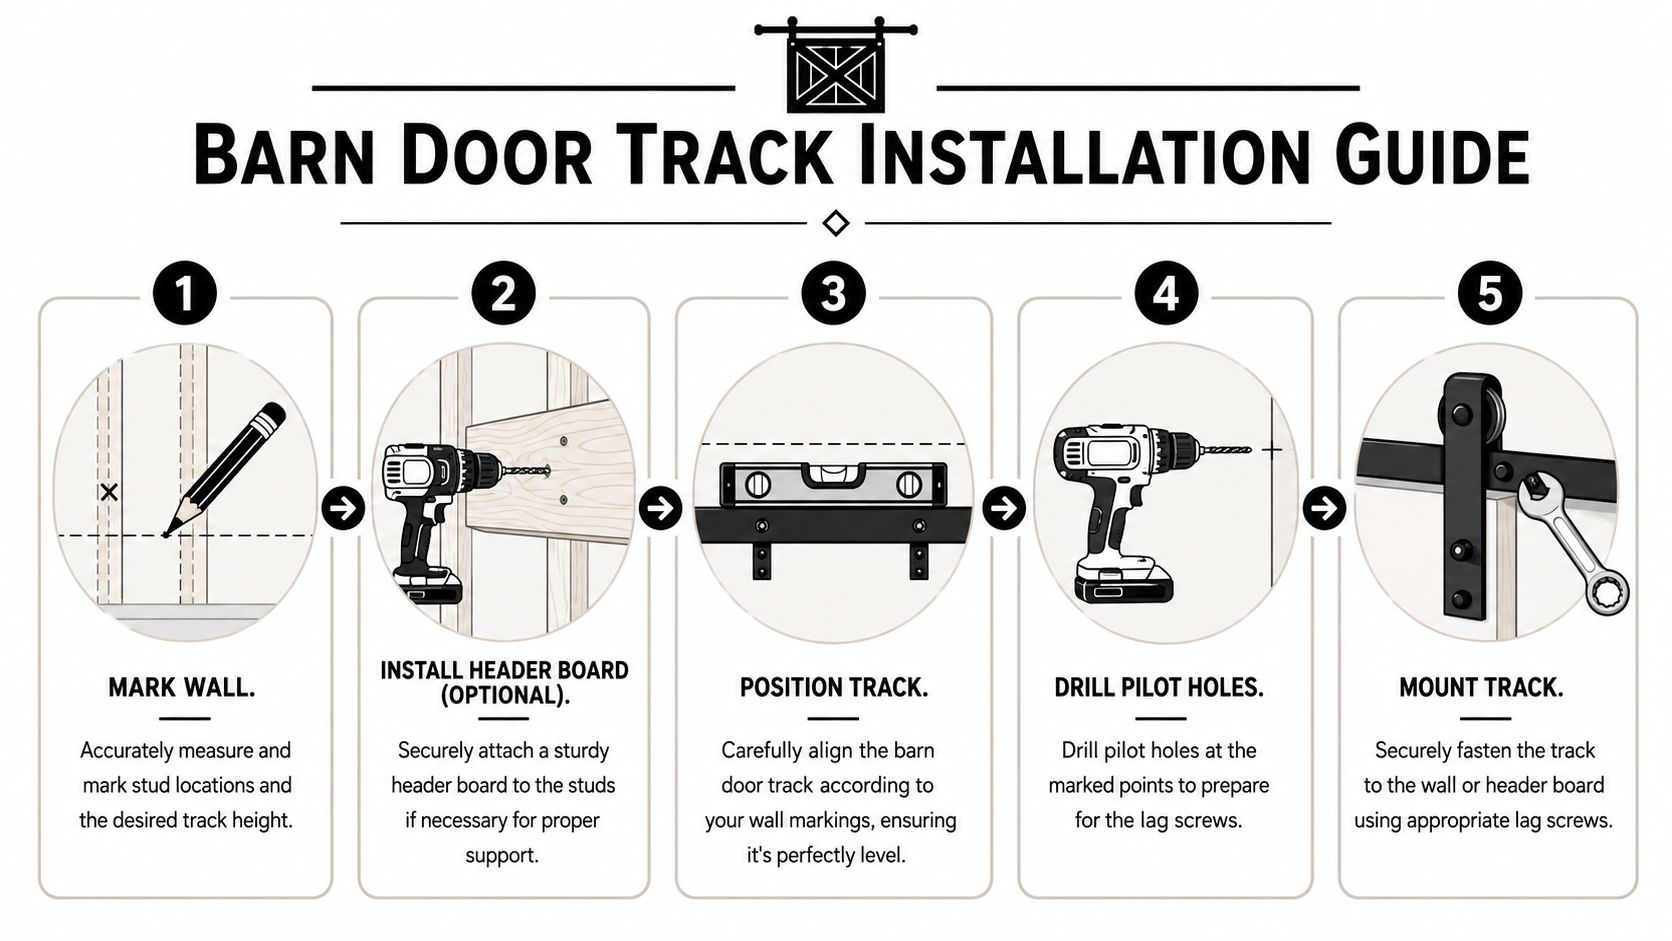
The track needs solid support, and it needs to be level. According to Willamette Carpentry's installation guide, inadequate structural support is a primary cause of failure. The track should be anchored to studs or added blocking, and it must be level so the door doesn't drift open or closed on its own.
Find structure before you do anything else
Start by locating the studs. Mark each one clearly. Then step back and compare those marks to the track hole pattern. If the holes and studs line up cleanly, great. If they don't, don't force a weak install just because the hardware kit looks close enough.
That's when a header board, often called a backer board, becomes the smart solution. You fasten the board securely into the studs first, then mount the track to that board. It gives you flexibility on hole placement and spreads the load better across the wall.
For homes in West Texas and Southeastern New Mexico, this step matters more than people expect. You may be dealing with repairs from older remodels, drywall over uneven framing, or surfaces that aren't giving you a clean, dependable fastening point. In some homes, especially where masonry is involved, you need to slow down and match your fastener strategy to the substrate.
Set the height and check the slide path
Before drilling, confirm the full path of travel. The door needs enough blank wall to slide open without running into switches, vents, trim returns, or nearby furniture.
Then mark your track height carefully. If you're using a backer board, keep your reveals consistent and your reference line level from end to end. One DIY guide referenced in the verified material notes a common target of about 1 inch of space between the door top and the wall or track assembly when a backer board is used, which gives you a useful reference point while laying things out.
Measure twice, drill once. On a barn door track, the first bad hole usually creates three more problems.
Mount the board, then mount the rail
If a header board is needed, install that first and make it look intentional. Sand it, finish it if needed, and center it properly over the opening. A sloppy backer board makes the whole job look improvised.
Then mount the track.
- Hold the rail to your layout line and confirm level before any fastener is tightened fully.
- Drill pilot holes where required. This keeps lag screws from wandering.
- Tighten hardware in sequence rather than cranking one end down first.
- Recheck level during tightening because rails can shift as the hardware seats.
If the wall around the opening is part of a feature area, nearby details matter. A floating shelf, accent treatment, or trim package can compete with the hardware if everything lands at different heights. If you're tying the doorway into a broader design plan, accent wall shelf ideas can help you think through the visual balance before the rail goes up.
What works and what doesn't
What works is a rail attached to real structure, with layout lines checked from more than one point.
What doesn't work is assuming drywall anchors alone will handle the load, eyeballing the height, or trusting a wall to be flat because it looks flat from across the room. Sliding hardware is unforgiving. If there's a dip, twist, or slight out-of-level condition, the door will show it every time it moves.
Assembling and Hanging the Door
This is the part homeowners look forward to because the project finally starts looking like something. Up to now, you've been measuring, marking, drilling, and second-guessing little lines on the wall. Once the rollers go on and the slab comes off the floor, the whole room changes.
I still tell people to slow down here.
A lot of clean installs get sloppy at this stage because the hard part feels done. It isn't. You're now handling the finished piece everyone will notice first.
Attach the rollers carefully
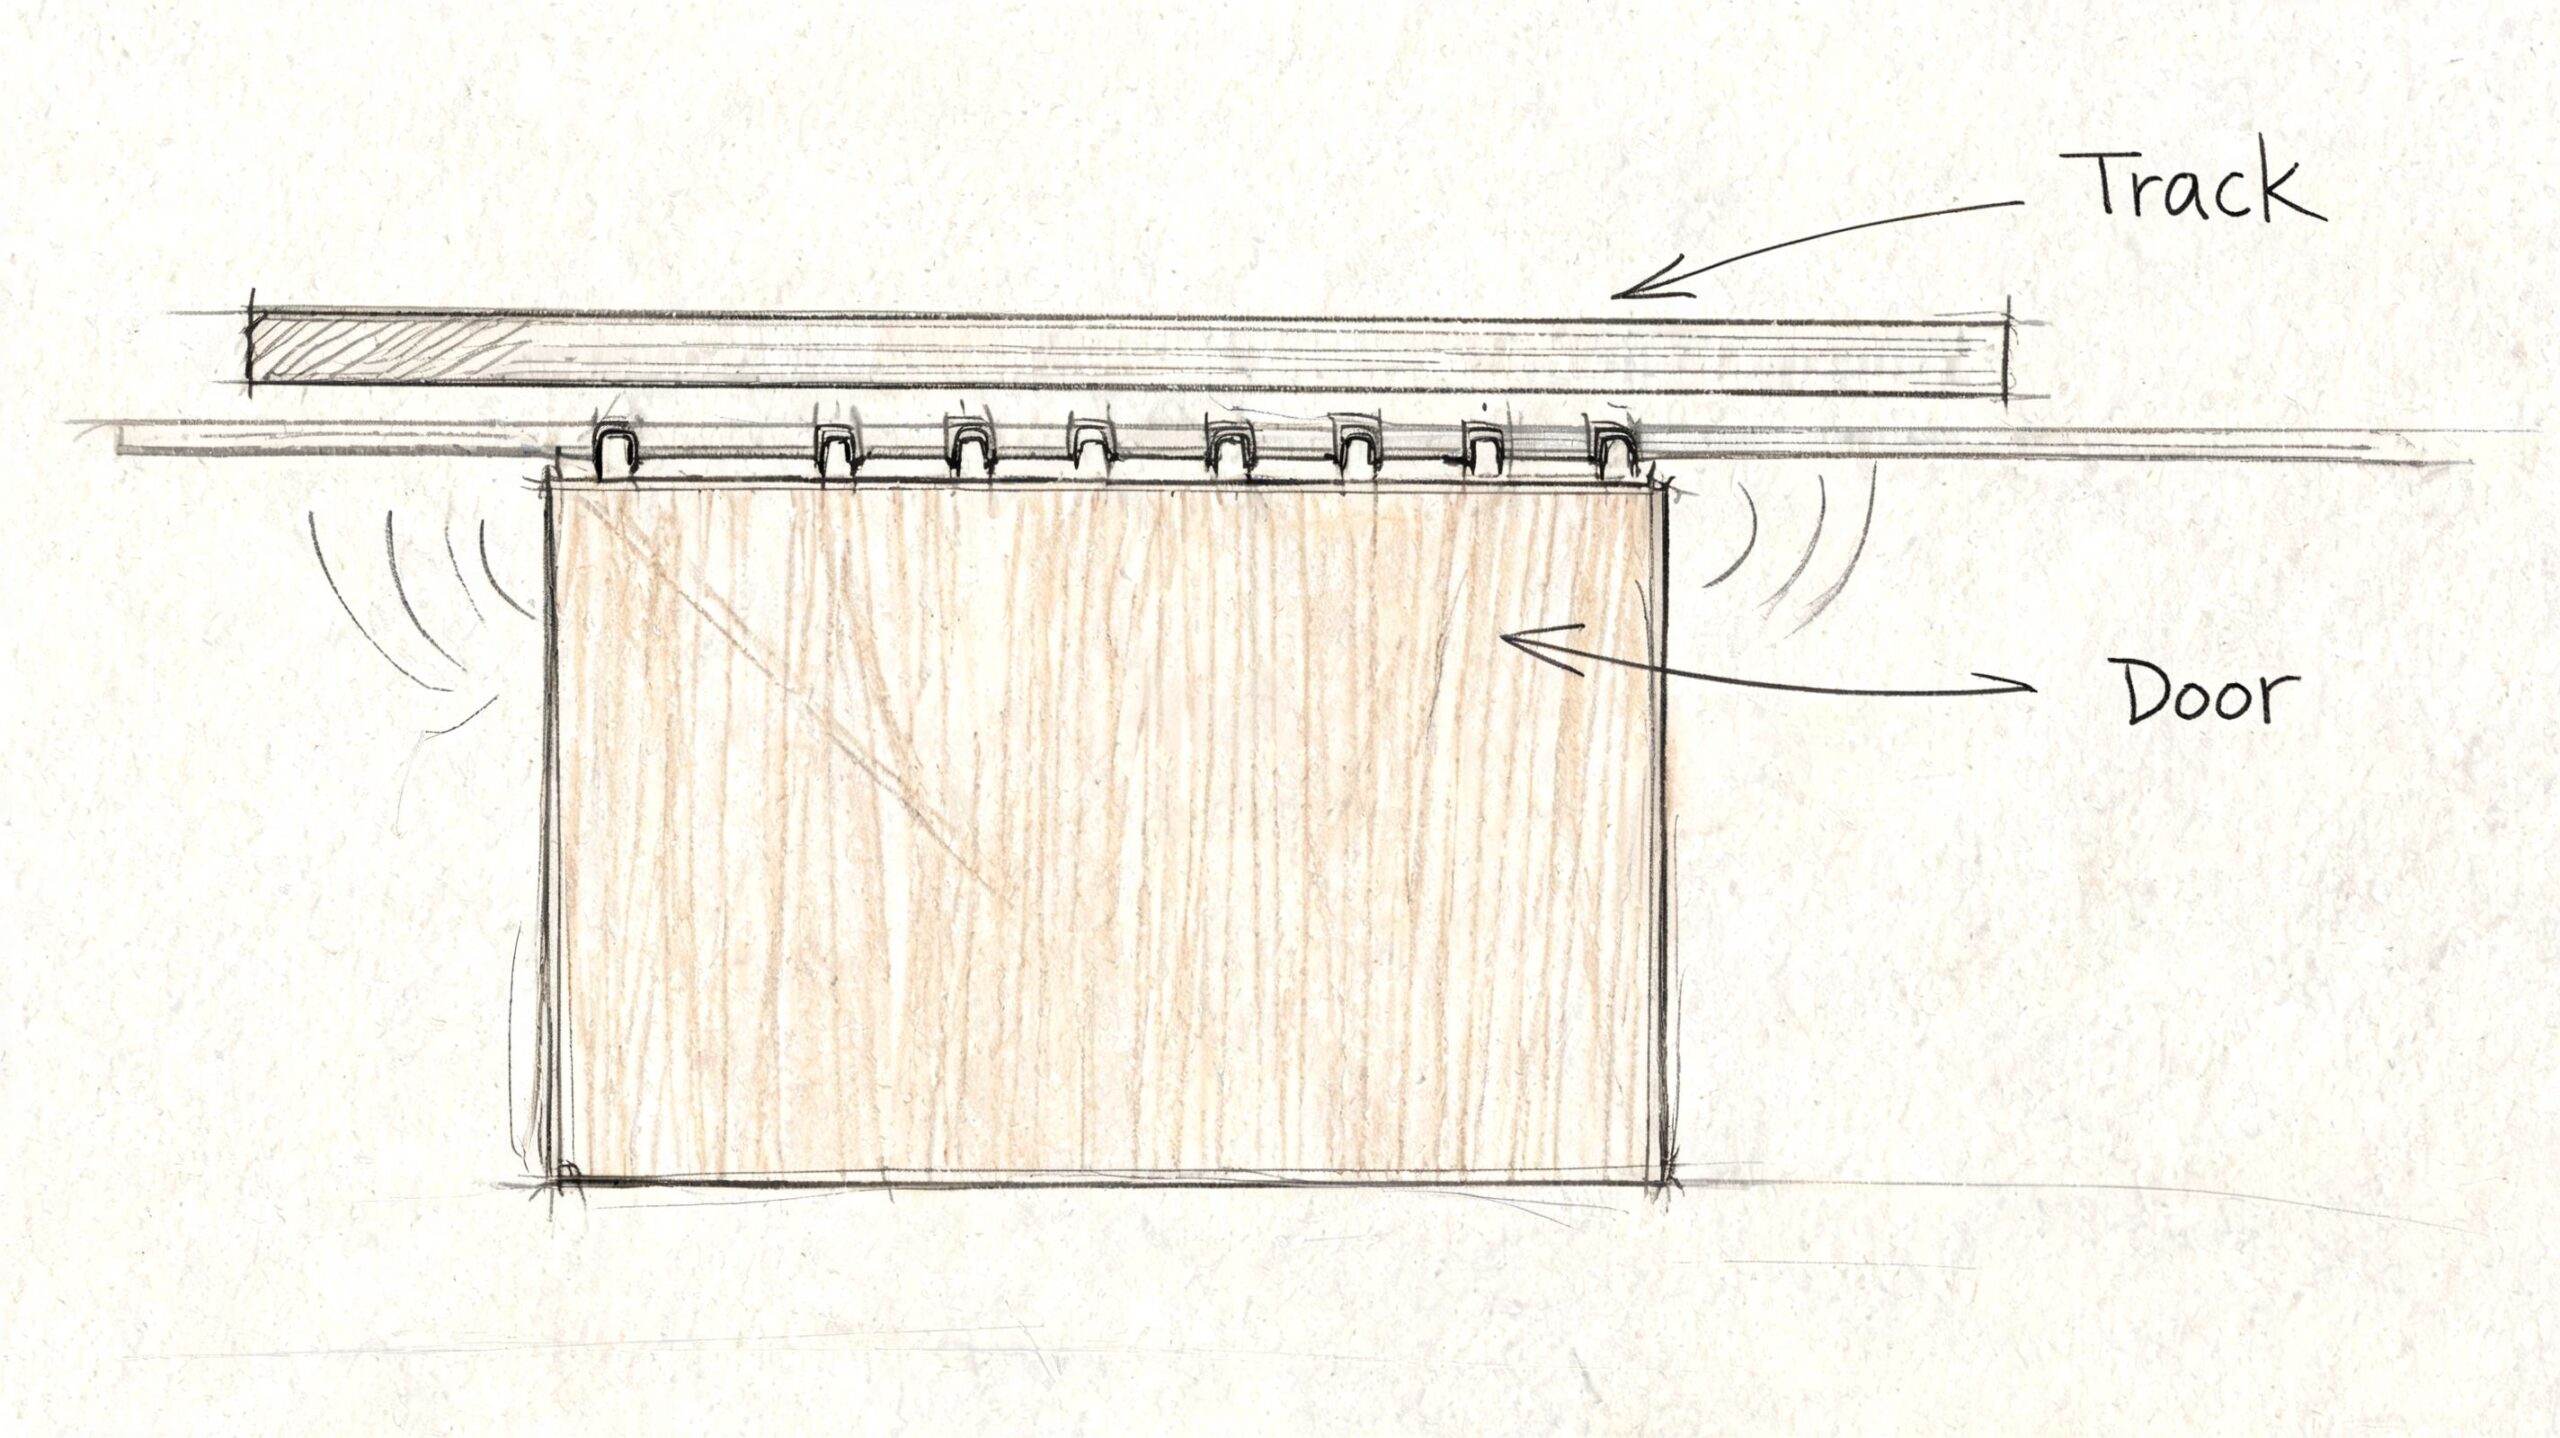
Lay the door flat on padded sawhorses or a protected surface. Follow the hardware pattern exactly, and make sure your left and right roller positions mirror each other. If one sits even slightly off, the door can hang out of plumb and you'll end up chasing the problem later with adjustments that never quite fix it.
Check these before tightening anything all the way:
- Top edge condition: Don't mount hardware over damaged wood or weak joinery.
- Hole spacing: Measure from both edges so the roller brackets sit evenly.
- Fastener bite: Screws need solid purchase, especially on heavier panels.
Lift it with help
This is a two-person move. One person can guide, but two people make the lift controlled and safe.
Bring the door upright, lift evenly, and set the rollers onto the track without forcing them. Once it's hanging, let it settle before you decide whether anything looks off. Sometimes a door appears slightly uneven until the weight fully seats into the hardware.
If the door doesn't want to drop onto the rail cleanly, stop and check alignment. Don't muscle finished hardware into place.
Install the safety pieces
The stops and anti-jump parts are not optional trim pieces. They're part of the system.
Set the travel stops so the door lands where you want it both open and closed. Then install the anti-jump hardware according to the kit instructions so the door can't lift off the track during use. The Home Depot guidance referenced earlier also recommends test-running the door and confirming the anti-jump discs and stoppers are secure, which matches what any careful installer does in the field.
Once everything is in place, slide the door back and forth several times. You're listening for scrape points, feeling for drag, and watching whether the panel hangs comfortably without trying to roll on its own.
That first smooth pass is the payoff.
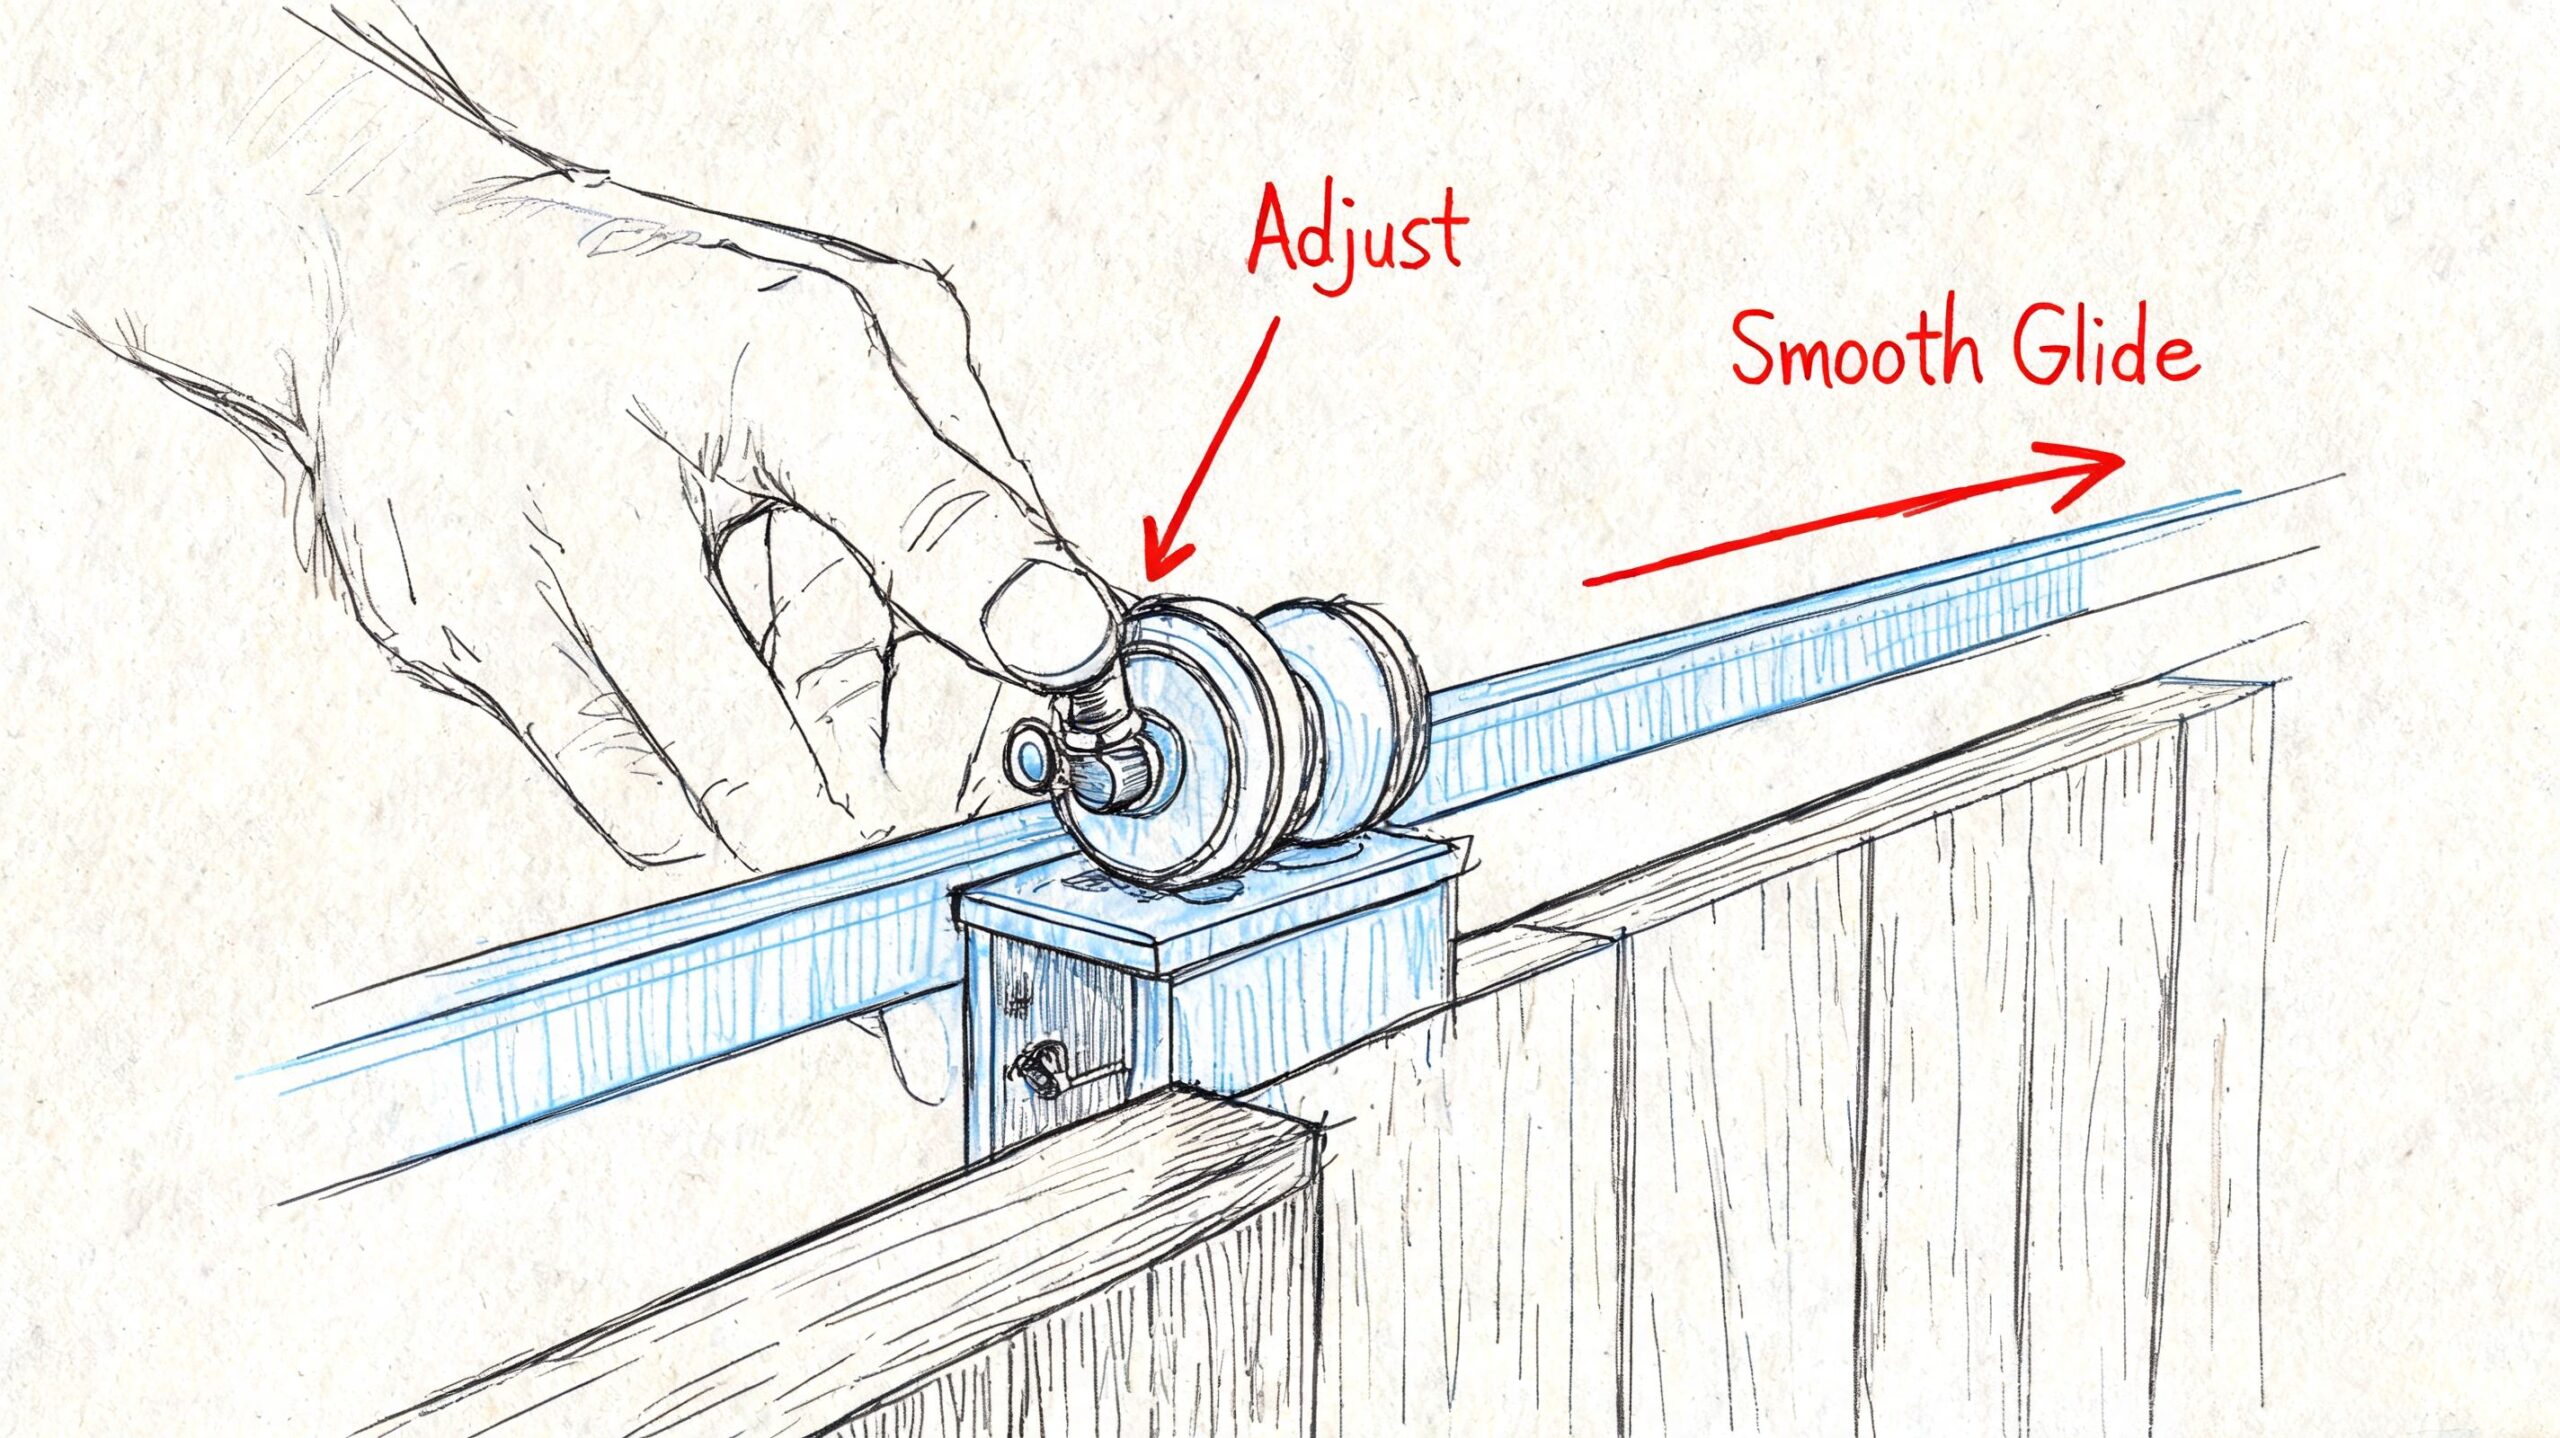
Making Final Adjustments for a Perfect Glide
A hung door can still feel cheap if the final adjustments are rushed. This part is where a barn door installation goes from “it works” to “that feels right.”
Start with the door stops. These determine how the panel lands over the opening and how far it clears when open. Tiny changes here affect the visual reveal, the overlap, and whether the handle ends up in a comfortable position.
Tune the movement
If the door rolls on its own, the track is likely out of level or the wall is telegraphing an uneven install. If the gap looks inconsistent from top to bottom, the roller hardware may need adjustment, or the door itself may be revealing a wall that isn't plumb.
Use this checklist:
- Door drifts open or closed: Recheck rail level first.
- Bottom swings away from wall: Install or adjust the floor guide.
- Door looks crooked: Confirm roller bracket placement and door plumb.
- Door rubs during travel: Check stops, floor guide alignment, and trim interference.
Don't skip the floor guide
The floor guide is small, but it changes the feel of the door in a big way. Without it, the bottom can swing outward, especially in homes where the floor has slight unevenness or foot traffic catches the edge.
A properly placed guide keeps the slab tracking where it should. The movement feels quieter, more controlled, and more solid.
A barn door should slide with intention. If it wobbles, bangs, or hunts for its path, something still needs attention.
Finish details that matter
If the door came unfinished, paint or stain it before the room starts using it hard. It's easier to get a clean finish before handles, fingers, pets, and daily traffic start testing the surface.
Pay attention to the handle location, too. A beautiful pull mounted too high or too close to the edge will feel awkward every day. The details that seem small during installation are usually the ones you notice every morning after.
Troubleshooting Common Issues
The cleanest-looking barn door installation can still hit a snag once real walls get involved. That doesn't mean the project failed. It means you've reached the part the packaging leaves out.
The most common problems usually come down to wall conditions, layout assumptions, or hardware choice.
When the wall fights back
Some walls aren't flat. Some studs don't land where the track holes want them. Some openings have low clearance, bulky trim, or nearby walls that limit travel.
That's why generic advice often falls short. Real remodels often need a backer board, a better understanding of overlap space, or customized low-clearance hardware, as discussed in Putnam Farmhouse's installation notes for custom sliding barn doors.
Here's how to think through common trouble spots:
- Misaligned studs: Use a properly fastened backer board so the track can mount where it needs to, while the load still transfers into structure.
- Low clearance above the opening: Look at low-clearance hardware options before forcing a standard kit into a space that doesn't fit.
- Uneven trim or proud casing: Recheck whether the selected door has enough coverage and enough stand-off from the wall.
- Adjacent wall interference: Confirm the handle, casing, and door edge all have room during full travel.
Know when to stop and get a second set of eyes
There's no prize for forcing a questionable install.
If you find damaged framing, uncertain wall composition, or fastening conditions you can't identify with confidence, pausing is the smart move. The same goes for heavy custom doors, double-door systems, or installs that involve masonry, tile, or expensive finishes you don't want to risk.
A good homeowner protects the house first and the pride second.
The practical standard
If the door covers the opening correctly, the rail is level, the hardware is anchored to real structure, and the guide controls the bottom edge, you're in good shape. If one of those is missing, the problem usually shows up fast.
For homeowners who want help choosing pieces that work with the room instead of just fitting the opening, Miller Waldrop Furniture & Decor can be a useful planning resource. Their design services can help you think through how a barn door fits with furniture layout, room flow, and the surrounding finishes before you commit to the install.
A smart barn door project doesn't just fill an opening. It improves how the room works every day. If you want help pulling the whole space together, from layout to finishes to the furnishings around it, Miller Waldrop Furniture & Decor offers design guidance for homes across West Texas and Southeastern New Mexico.

