Accent Wall Shelves: A Homeowner’s How-To Guide
A lot of homes have one wall that never quite comes together. It isn’t bad. It just sits there. Maybe it’s the wall behind the sofa, the stretch above a console in the hallway, or the spot in a bedroom that feels unfinished no matter what you hang on it.
Accent wall shelves solve that problem with surprising effectiveness. They add storage, shape the room, and give you a place to display the pieces that make a house feel personal. They also aren’t a passing idea. The global market for wall-mounted shelves is projected to grow to over $3.7 billion by 2025 according to Cognitive Market Research’s wall-mounted shelves report, which tells you plenty of homeowners are using vertical space as part of everyday design.
Turning a Blank Wall into Your Canvas
A blank wall usually needs one of three things. It needs function, a focal point, or personality. Accent wall shelves can handle all three at once, which is why they work in living rooms, bedrooms, entryways, and even dining spaces.
In West Texas and Southeastern New Mexico, that flexibility matters. Many homes need pieces that can hold up visually in open floor plans, rooms with strong natural light, and spaces that shift between family life, work, and entertaining. Shelves let you keep the room adaptable without crowding it with more furniture.
Start by deciding what job the wall needs to do
Some walls need practical help. They need a place for books, baskets, framed photos, or a catchall zone that keeps surfaces cleaner.
Other walls need visual structure. A large sofa, bed, or buffet can look disconnected from the architecture around it. Shelves create a line for the eye to follow, which makes the room feel more intentional.
A third group of walls needs warmth. That’s where styling matters. Wood shelves, framed art, pottery, and a small plant can make a room feel finished without making it feel busy.
A good shelf wall shouldn’t feel like extra stuff on the wall. It should feel like the room was missing it all along.
Pair shelving with the wall behind it
Shelf design gets stronger when the background supports it. If you’re choosing paint first, or rethinking the wall color before you install, a resource like Puget Sound accent wall colors is useful because it shows how different tones change the mood behind decor and shelving.
If you want the accent wall itself to feel balanced before you even place a shelf, this guide on creating a perfectly balanced accent wall gives a solid framework for proportion and visual weight.
What works and what doesn’t
Here’s the common trade-off.
- What works: A shelf wall with a clear purpose, enough breathing room, and a finish that matches the rest of the room.
- What doesn’t: Shelves installed just because the wall looks empty, with no plan for scale, spacing, or what they’ll hold.
That’s the difference between a display that feels curated and one that feels like leftovers from other rooms. The good news is that the professional result often desired usually comes down to a few measurable choices, not mysterious design talent.
Planning Your Perfect Shelf Layout
The best accent wall shelves are planned on paper first. A tape measure, painter’s tape, and a quick sketch will save you from most of the mistakes that make shelves look awkward once they’re mounted.

Use placement rules that already work
Shelf placement doesn’t need to be guessed. For optimal viewing, design experts recommend hanging shelves so their center is between 55 and 59 inches from the floor, and when stacking multiple shelves, a spacing of 10 to 14 inches creates a balanced look, as outlined in this floating shelf spacing guide.
Those measurements give you a reliable starting point. They aren’t meant to override your room, but they keep the layout from drifting too high, too low, or too cramped.
Choose a layout style that matches the room
Three layout types solve most shelf-wall situations well.
Symmetrical layout
This works best over a sofa, buffet, or bed when the room already feels formal or balanced. Matching shelf lengths and equal spacing create calm.Asymmetrical layout
This feels more relaxed and collected. It’s good in family rooms, casual living spaces, and corners that need movement rather than strict order.Staggered layout
This works when you want shelves to interact with art, a lamp, or nearby furniture. It’s often the best choice when the wall is wide but not very tall.
Practical rule: Tape the shelf outlines on the wall before drilling. If the arrangement looks good in painter’s tape from across the room, it usually works in real life.
Plan around what the shelves will hold
A shelf for framed photos is different from a shelf for heavy books. A picture ledge can be shallower. A styling shelf over a desk may need room for baskets, cords, or a small lamp.
That same thought process shows up in utility spaces too. If you’ve ever looked at bespoke butler pantry storage solutions, you’ve seen how the best shelving plans start with use first and layout second. The same idea applies in a living room or bedroom.
Sketch the room before you shop
A quick planning pass can be simple:
- Measure the wall: Note the full width and height, then subtract trim, windows, light switches, and nearby furniture.
- Mark the visual center: This is often above the furniture below, not always the exact center of the wall.
- Test shelf lengths: Longer shelves read cleaner. Short shelves create more rhythm.
- Leave negative space: Every shelf doesn’t need to span the wall.
If you want help thinking through spacing with the rest of the room, this article on how to plan a room layout is useful because shelf walls almost always look better when they relate to the furniture around them.
Selecting the Right Shelves and Materials
Material changes the whole personality of accent wall shelves. Two layouts can be identical and still feel completely different once you swap stained wood for black metal or glass.
The best choice usually comes down to two questions. What style do you want the room to have, and how forgiving do you need the shelf to be in everyday life?
Shelf style trade-offs
Floating shelves give the cleanest profile. They’re great for modern, transitional, and lightly rustic spaces. They also ask more of the installation because the mounting has to be exact.
Bracketed shelves are easier for many DIY projects. They can lean farmhouse, industrial, traditional, or casual depending on the bracket shape and finish. They also make the support system visible, which some homeowners prefer because it feels more honest and architectural.
Picture ledges are simpler and shallower. They’re ideal for layered art, cookbooks, and rotating family photos, but they aren’t the right pick if you need deeper storage.
Shelf Material Comparison
| Material | Best For Styles | Pros | Cons |
|---|---|---|---|
| Wood | Rustic, transitional, farmhouse, organic modern | Warm, versatile, easier to style with existing furniture | Can feel heavy if the shelf is too thick or too dark |
| Metal | Industrial, modern, minimalist | Crisp lines, durable appearance, strong visual contrast | Can read cold if the room already has hard finishes |
| Glass | Contemporary, lighter spaces, smaller rooms | Airy look, keeps the wall visually open | Shows dust quickly and feels less grounded for layered styling |
| Wood with metal brackets | Casual, loft-inspired, eclectic | Balances warmth and structure | More visually busy than a true floating shelf |
Match material to local home character
In this region, medium-to-warm wood tones often work well because they connect nicely with leather seating, natural stone, iron details, and the earthy palettes common in local homes. If the room already has a lot of visual texture, a smoother shelf profile usually looks better than an ornate one.
If the room feels flat, decorative brackets can add needed character. If the room already has heavy furniture, floating shelves often keep the wall from feeling too dense.
A good example of a shelf-friendly companion piece is a versatile accent cabinet or console from a curated home collection, especially one with a warm wood finish that can visually anchor the wall below. For readers browsing room pieces that pair naturally with shelving, the accent furniture collection is a practical place to study proportions, finishes, and styling combinations.
A Step-by-Step Guide to Secure Installation
This is the part that separates a shelf wall that lasts from one that slowly tilts, loosens, or scares you every time someone shuts a door too hard.
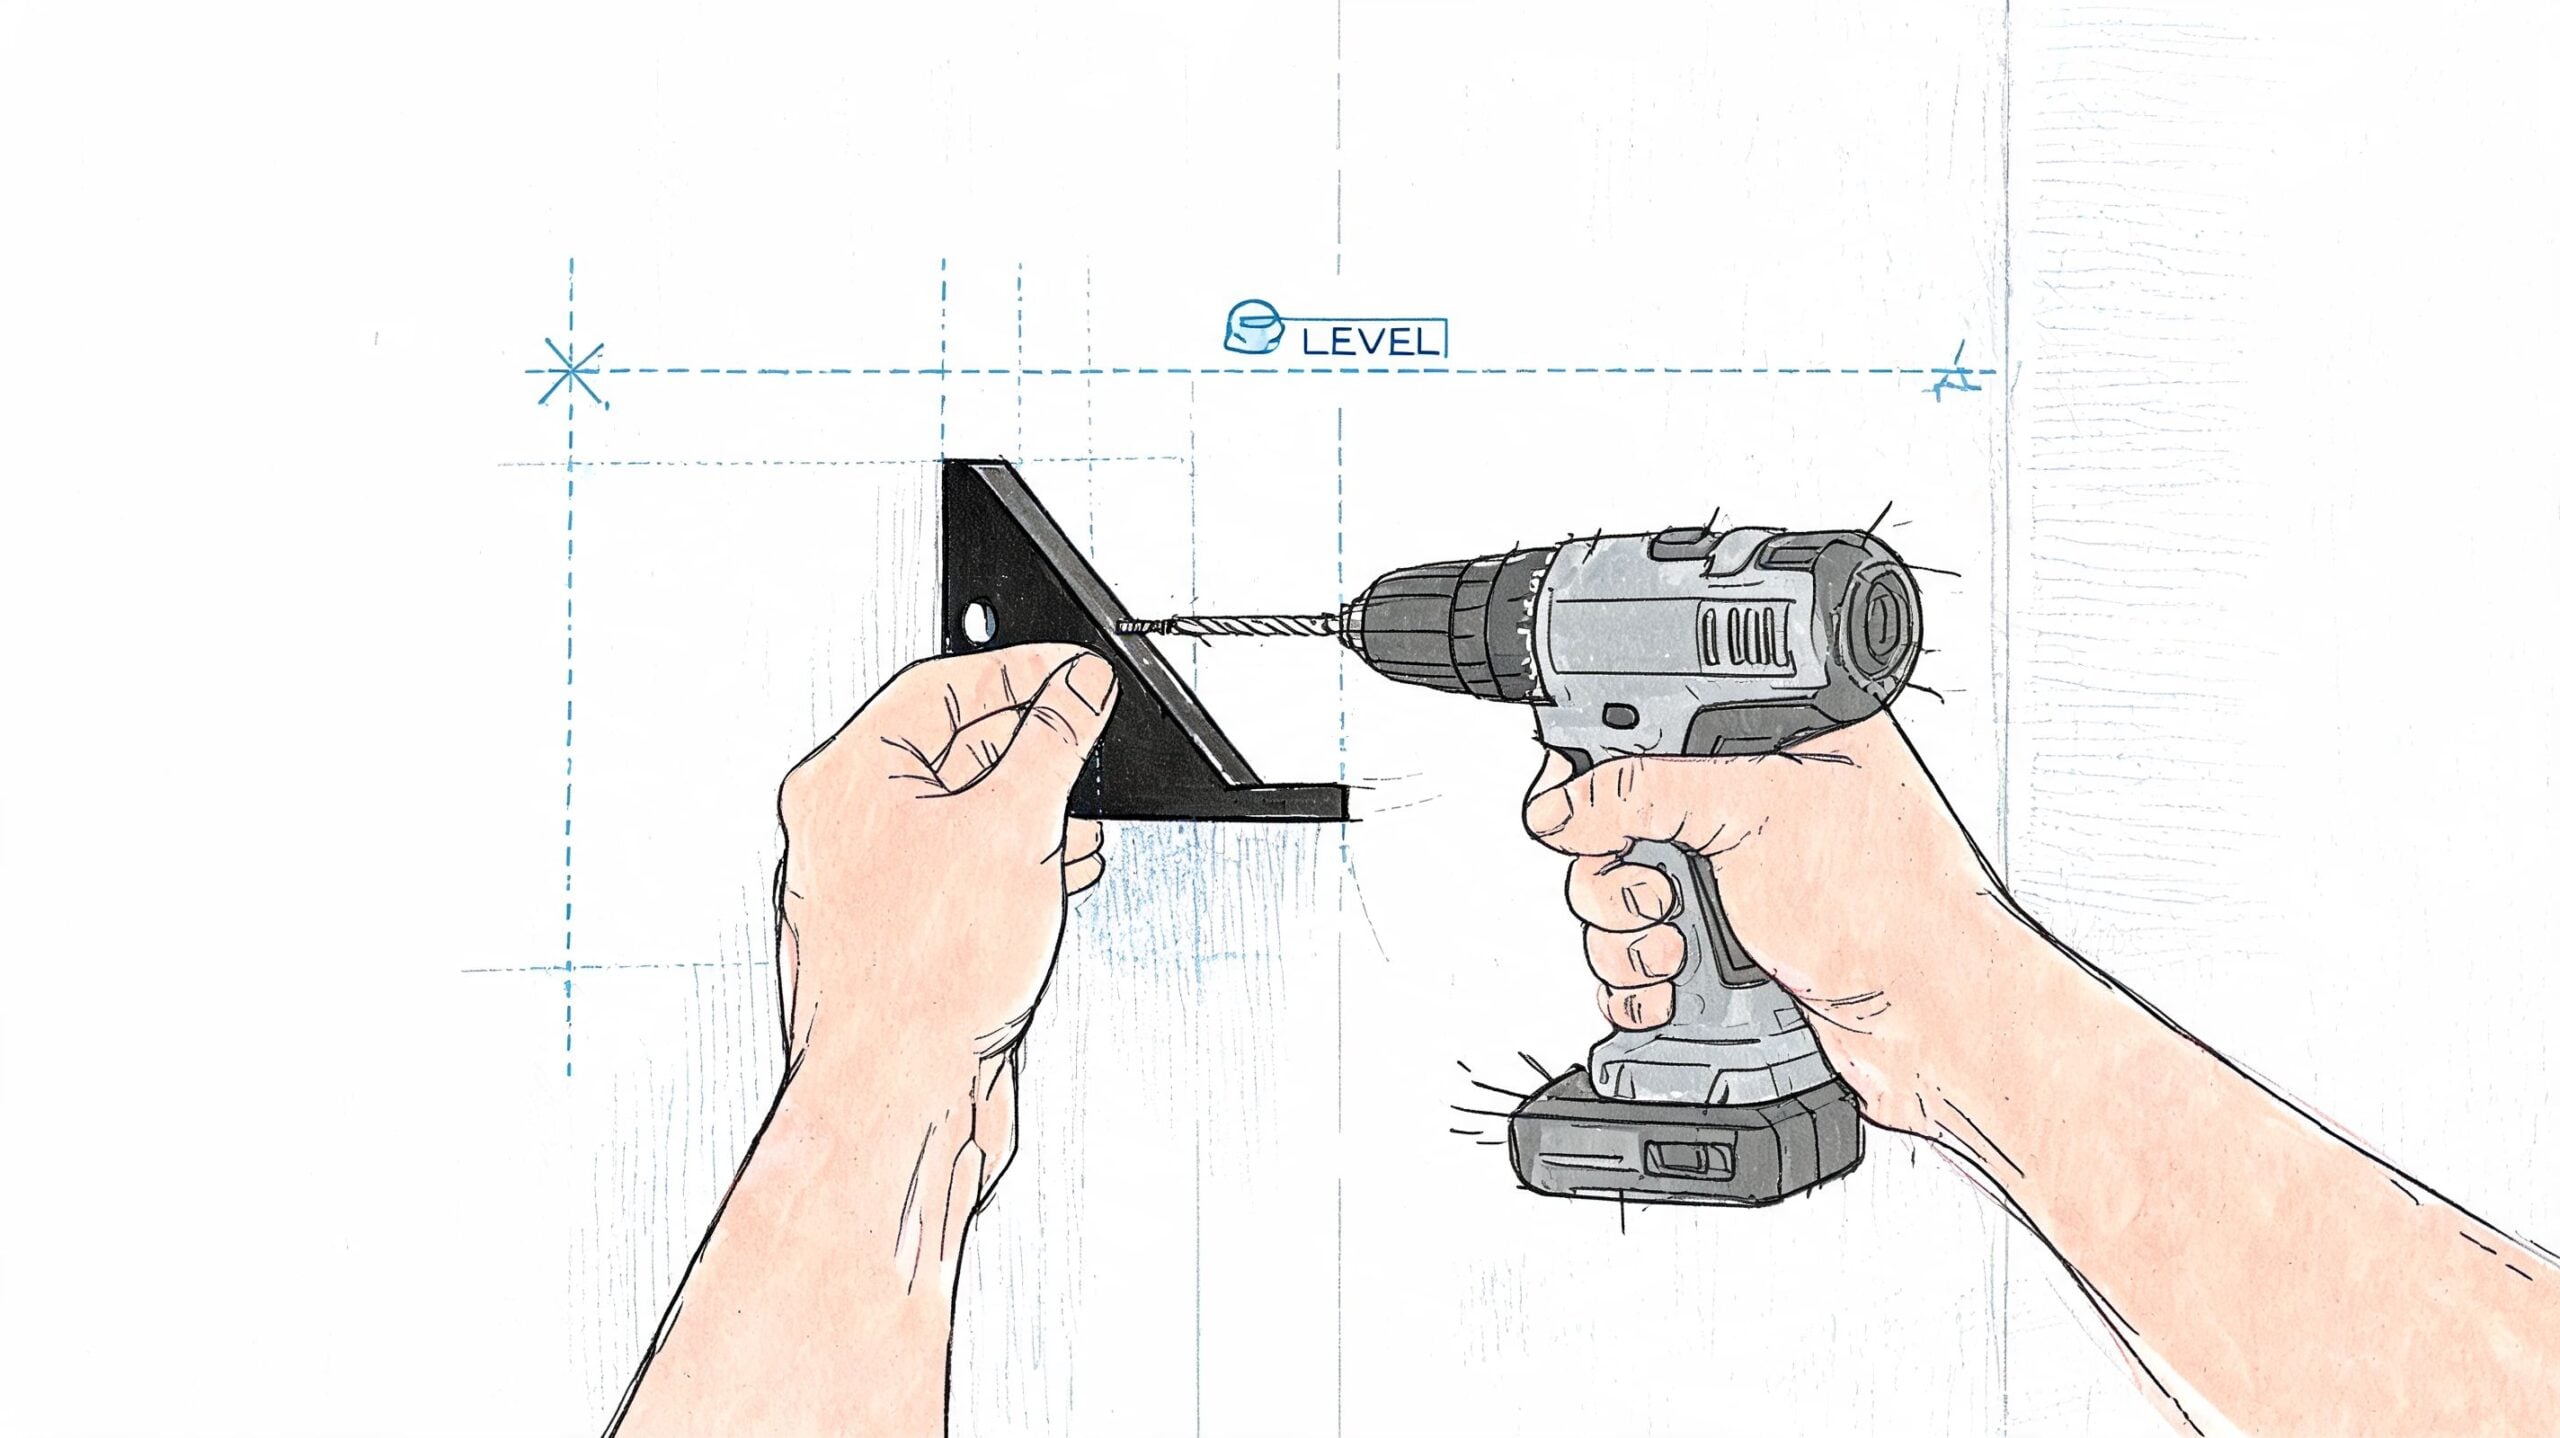
Properly installed premium floating shelves can typically support 15 lbs per running foot, but that capacity depends on securing brackets directly into wall studs. Drywall anchors alone are insufficient for significant weight, according to Van Dyke’s guidance on floating shelf depth and support.
Gather the right tools first
You don’t need a contractor’s trailer worth of gear, but you do need the basics:
- Stud finder: For locating secure anchor points
- Level: To keep shelves from drifting visually and structurally
- Drill and appropriate bits: Different wall types need different bits
- Tape measure and pencil: For repeatable placement
- Painter’s tape: For mockups and mark lines
- Screws and hardware matched to the wall type: Drywall, brick, and plaster all behave differently
A lot of installation frustration starts when people try to substitute hardware they already have. Shelf hardware isn’t the place to improvise.
Install in this order
Start with the wall, not the shelf.
Locate the studs
Mark each stud clearly. Check the marks twice so the bracket doesn’t land between them.Lay out the bracket line
Use a level to draw the exact line where the shelf support will sit.Dry-fit the hardware
Hold the bracket or mounting cleat in place before drilling. This catches clearance issues early.Drill and mount
Secure the support system firmly. If the shelf system depends on hidden rods or a cleat, any looseness now will show later.Test before styling
Apply gentle downward pressure before adding decor. If there’s movement, fix it now.
Shelves rarely fail because of the wood you can see. They fail because of the hardware and wall connection you can’t.
Know your wall before you commit
Drywall over studs is straightforward. Plaster can crack if you rush it. Brick or masonry may be excellent for support, but you need the right bit and anchors.
Older homes sometimes surprise you. A wall that looks simple can hide patchwork, uneven framing, or previous repairs. If the bracket doesn’t sit flush, don’t force it and hope the shelf will hide the issue. Correct the mounting surface first.
Renter-friendly and temporary options
Not every shelf wall has to be permanent. Renters, home stagers, and anyone setting up a temporary space can still create the accent shelf look, but the strategy changes.
Consider these lower-commitment approaches:
- Picture ledges on limited fasteners: Better for lightweight styling than heavy storage
- Leaned art with one small shelf: Less wall impact, still gives a layered look
- Freestanding étagères or bookcases used like a shelf wall: Good when wall alteration isn’t allowed
- Damage-conscious mounting systems for very light decor: Suitable only when the product is rated for the exact wall type and load
The trade-off is simple. The less permanent the installation, the lighter and simpler the styling needs to be.
Styling Your Shelves to Tell a Story
A well-installed shelf can still look unfinished if everything on it is the same height, the same color, or placed in a straight line like inventory. Styling is what turns accent wall shelves into a focal point.
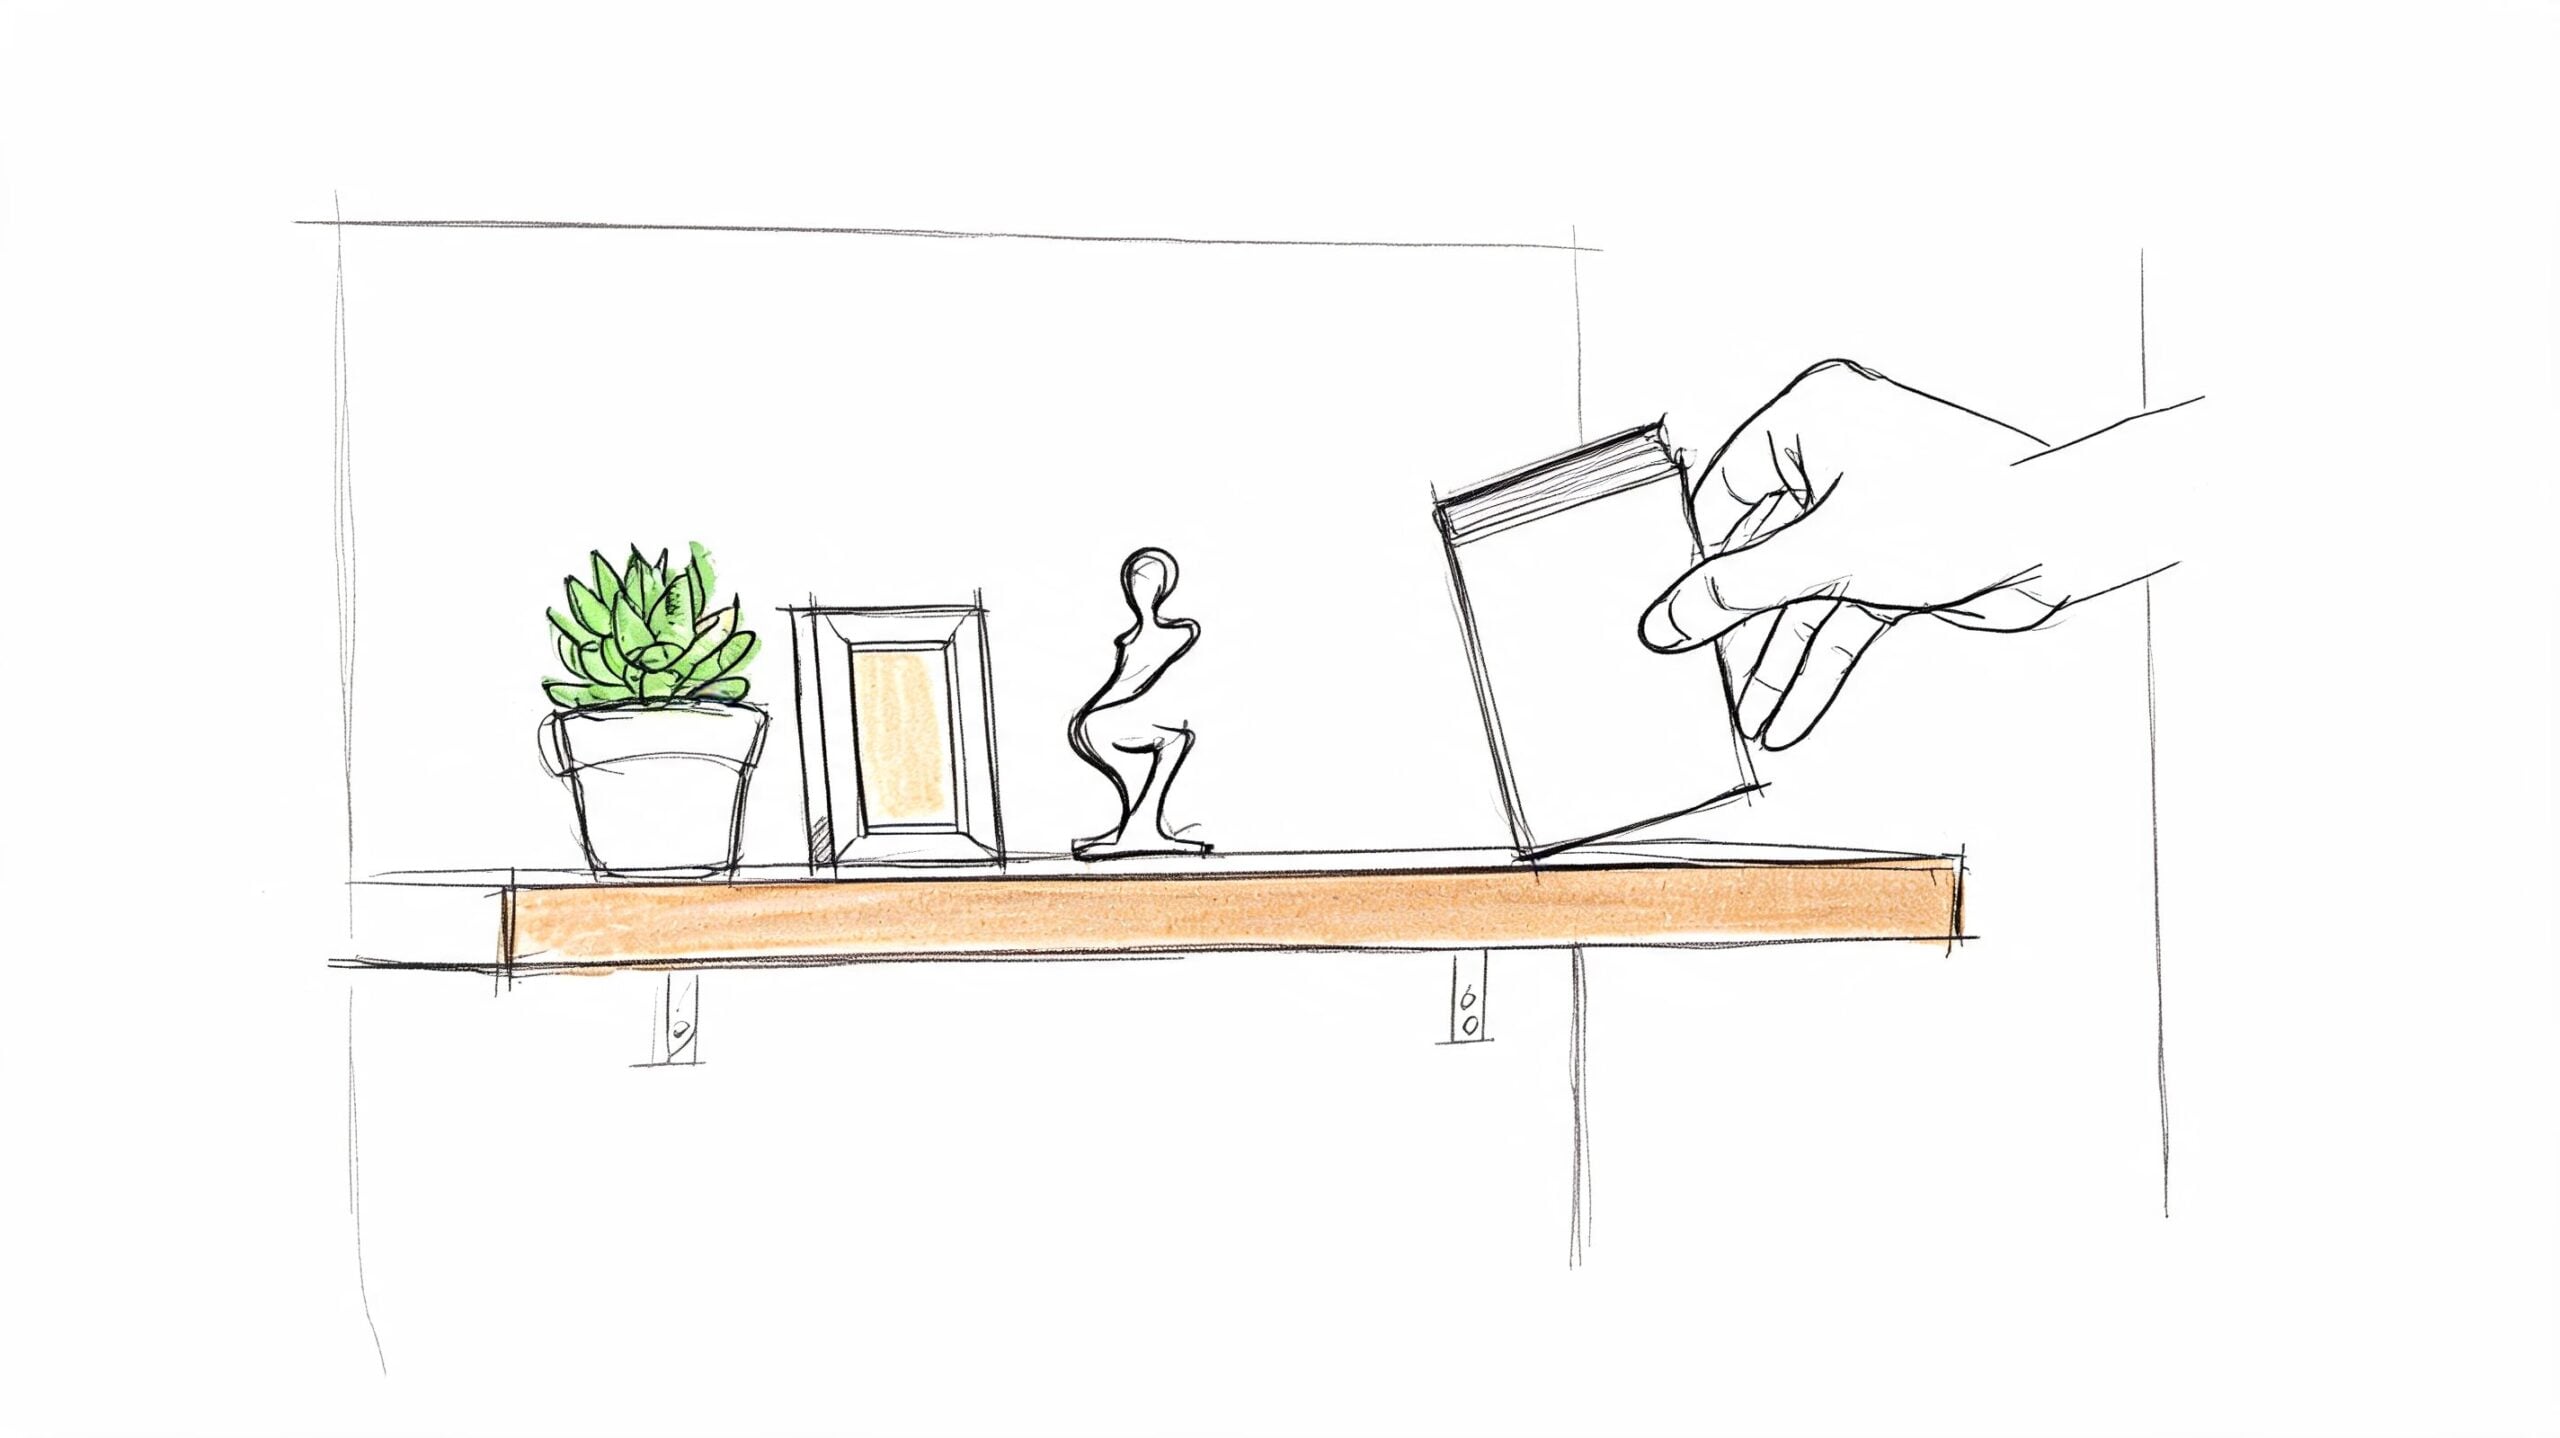
Build one small moment at a time
The easiest way to style shelves is to think in small groupings, not the whole wall at once.
On one shelf, place a stack of books flat, then add a small object on top. On another, lean a framed photo behind a bowl or candle. On the next, use one taller piece to break the line and draw the eye upward.
That layering gives the wall depth. Without it, shelves look flat and overly arranged.
Mix personal pieces with visual relief
A shelf wall should say something about the people in the home. That usually means mixing practical decor with personal items.
Try this balance:
- Something vertical: A vase, candlestick, or framed art
- Something organic: A plant, branch, or woven piece
- Something personal: A photo, travel piece, heirloom, or favorite book
- Something grounding: A box, bowl, or low stack that visually settles the shelf
If you want greenery that suits indoor shelf styling, this guide on indoor succulents from The Cactus Outlet is a helpful starting point because shelf plants need to stay compact and visually tidy.
Leave some shelf surface visible. Empty space is part of the design, not a sign you forgot something.
A simple shelf story that works
A common living room setup looks good for a reason. Start with a warm wood shelf above a console. Lean one medium frame slightly off-center. Add a small stack of books beside it. Place a ceramic object on the books. Finish with a trailing or upright plant at the opposite end.
Now the shelf has contrast, height change, and a natural stop at each side. Repeat that idea across the wall, but don’t duplicate it exactly. Similar rhythm looks intentional. Repetition looks staged.
If you want more visual examples for different rooms, this guide on how to decorate shelves in any room gives useful direction on mixing function and display without creating clutter.
Your Partner in Home Design
Accent wall shelves look simple when they’re done well. That’s because the best projects rely on quiet decisions made early. The right height, the right spacing, the right material, the right amount of styling. None of those choices are complicated on their own, but together they create the difference between a wall that feels random and one that feels finished.
That’s also why professional guidance can save time, money, and second-guessing. Sometimes you need help deciding whether the wall needs two shelves or three. Sometimes you’re trying to match wood tones across an open-concept room. Sometimes the shelf wall is only one part of a larger update, and you want the whole space to feel connected.
A good design partner helps you avoid expensive almost-right decisions. They help you scale the wall to the room, coordinate surrounding furniture, and choose pieces that still look right a few years from now.
For homeowners in Lubbock, Hobbs, and Ruidoso Downs, that local perspective matters. Homes here have their own light, proportions, and pace of living. The shelf wall that works in a downtown apartment somewhere else may not be the one that makes sense in your den, entry, or bedroom.
If you’re ready to turn a blank wall into something useful and memorable, the project is absolutely within reach. And if you want a seasoned eye to help you get there faster, that support should be easy to find close to home.
If you're ready to pair your accent wall shelves with furniture, decor, and design guidance that fits your home, visit Miller Waldrop Furniture & Decor. You can explore curated room pieces, get help choosing finishes and proportions, and work with a team that has helped families across West Texas and Southeastern New Mexico create comfortable, polished spaces since 1952.