How to Care for Wood Furniture

Keeping your wood furniture looking its best doesn't require a ton of effort, just a consistent, gentle approach. You have the power to preserve its beauty for years, maybe even for generations to come. It really boils down to your proactive routine: regular dusting, cleaning up spills the moment they happen, and polishing seasonally to keep the finish protected. The real secret is a simple routine using the right tools—like soft microfiber cloths—and steering clear of harsh chemicals. With this guide, you’ll become the hero of your home, equipped to protect your investment and keep your furniture’s story alive.
Your Guide to Lifelong Wood Furniture Care
Think of your wood furniture as more than just decor; it's a part of your home's story. This guide is your practical toolkit, empowering you to preserve that story for the long haul. We're skipping the generic advice to give you actionable strategies that make furniture care feel less like a chore and more like a rewarding part of home ownership.
You'll master the fundamentals of cleaning, polishing, and protecting various wood finishes, giving you the confidence to care for your most cherished pieces. When you know how to care for wood furniture, you ensure your investment continues to pay you back with timeless beauty and function.
Setting the Foundation for Success
It's no surprise that people are investing heavily in quality wood pieces. The global wooden furniture market was valued at an incredible USD 592.9 billion in 2024 and is only expected to grow. You can learn more about these wooden furniture market growth and trends. With such a significant investment in our homes, understanding proper care is more important than ever, especially since wood is naturally sensitive to things like heat and moisture.
To get you started on the right foot, here is a simple care plan. Think of it as your cheat sheet for keeping your furniture looking as stunning as the day you brought it home.
Expert Tip: Think of your furniture's finish as its armor. Your job is simply to keep that armor strong. A gentle, consistent routine you control will always be more effective than a rare, aggressive cleaning session.
Quick-Start Wood Furniture Care Plan
This table breaks down the essential tasks into a manageable schedule. Following this simple plan is the first and most important step you can take to protect your wood furniture.
| Frequency | Task | Recommended Tools |
|---|---|---|
| Daily/As Needed | Blot spills immediately | Soft, absorbent cloth |
| Weekly | Dust surfaces | Dry microfiber cloth |
| Monthly | Deeper cleaning | Damp cloth & mild soap |
| Seasonally | Polish and protect | Quality, silicone-free polish |
This simple rhythm of care is all it takes to maintain the value and appearance of your furniture for a lifetime.
Ready to find pieces that are truly worthy of this level of care? Here’s how you can choose the perfect dining room furniture to serve as the next heirloom for your family.
Building Your Daily and Weekly Care Routines
The real secret to making your wood furniture last a lifetime isn’t some miracle product you use once a year. It's the consistent habits you build—small, simple actions that stop damage before it even starts. By taking these steps, you're building a protective shield around your favorite pieces, one day at a time.
This isn’t just about wiping down a tabletop. It’s about understanding why you’re doing it. When these little steps become second nature, you're not just cleaning; you're actively preserving your furniture's story and ensuring it stays beautiful with surprisingly little effort.
The Foundation of Daily Furniture Care
The biggest threats to your wood furniture are the little things: dust, spills, and the daily grind. Your goal every day is to tackle these on the spot, turning what could be a disaster into a complete non-issue.
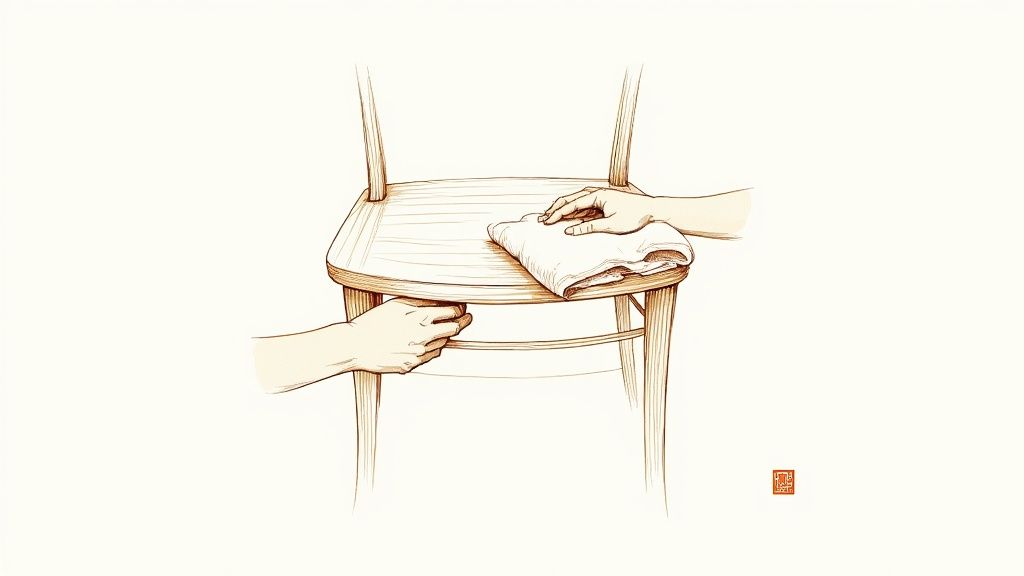
Your best tool here is a dry, soft microfiber cloth. Forget feather dusters—they just send dust flying into the air to resettle later. A good microfiber cloth actually traps those tiny abrasive particles. This is key, because those little specks are what create micro-scratches that dull an otherwise brilliant finish over time.
Spills are a different beast entirely. They demand your immediate action. The golden rule is to blot, don't wipe. Grab a clean, absorbent cloth and press gently. Wiping just smears the liquid around and can force it deeper into the wood grain, which is how you end up with those dreaded water rings.
Crafting Your Weekly Maintenance Rhythm
Once a week, give your furniture a slightly more focused cleaning. This is your chance to get rid of the fingerprints, smudges, and general grime that daily dusting misses. It only takes a few minutes.
- Gentle Cleaning: Lightly dampen a clean microfiber cloth with a little water. The biggest mistake people make is using a sopping wet rag. The cloth should feel barely damp to the touch, just enough to lift grime without leaving a trail of moisture.
- Work with the Grain: Always wipe in the same direction as the wood grain. This helps you clean inside the tiny grooves of the wood's texture and prevents you from creating ugly cross-grain scratches that really stand out.
- Dry Thoroughly: This step is non-negotiable. As soon as you finish damp-wiping, follow up with a separate dry, soft cloth to buff away any remaining moisture. This prevents water spots and leaves a perfect, streak-free shine.
This simple weekly ritual is all it takes to keep your furniture’s finish looking clear and beautiful. For a more detailed guide on seasonal care, empower yourself with our complete fall furniture maintenance checklist.
Remember, consistency trumps intensity every time. A light touch every week does far more good than a harsh, deep clean every few months. Your goal is to nurture the wood, not fight it.
Why Your Routine Matters So Much
At the end of the day, wood is a natural material. It breathes, it moves, and it's sensitive to its environment. Things like heat and moisture can really take a toll, which is why your proper care is so critical. Even the toughest woods like oak, maple, or mahogany need this basic maintenance to live up to their reputation for longevity.
By making these simple actions part of your daily and weekly habits, you’re doing more than just cleaning. You're preserving. You’re protecting your investment and ensuring your beautiful furniture will be around to tell your family’s story for generations to come.
Deep Cleaning and Polishing for a Lasting Glow
Your day-to-day dusting and weekly wipe-downs are the foundation of great furniture care, but every so often, your pieces need a little something more. You can give your furniture a restorative spa day with a deep clean and polish—a chance to bring back its natural luster and bolster its defenses against the wear and tear of daily life.
This isn't about harsh chemicals or aggressive scrubbing. It’s about treating your furniture with the respect it deserves, using techniques that nourish the wood. When you master this part, you’re not just cleaning; you're preserving its unique character for years to come.
Choosing the Right Tools for the Job
Before you even touch your furniture, let’s talk supplies. This is crucial because the wrong product can do more harm than good, stripping the finish or leaving behind a sticky residue that just attracts more dust. Your furniture's finish is its shield—your goal here is to strengthen it.
- Cleaners: Stick with pH-neutral, water-based cleaners made specifically for wood. Steer clear of all-purpose sprays that contain ammonia, bleach, or other harsh detergents. Honestly, a simple solution of mild dish soap and warm water applied with a well-wrung-out cloth often works just as well.
- Polishes: The single biggest mistake people make is grabbing a polish loaded with silicone or wax. Yes, they give you a quick, shiny finish, but over time they build up into a hazy, dull film that's a real pain to remove. This buildup also traps dirt and moisture right against the wood's finish.
You need a product that truly nourishes. A high-quality polish should feed the wood and leave behind a protective, breathable layer. For instance, our Heirloom Wood Polish is formulated to be the perfect tool for the job. It gets through the finish to moisturize the wood itself while buffing to a beautiful sheen that helps guard against daily scuffs and spills.
The Art of the Deep Clean
Deep cleaning should be a gentle, methodical process. You're aiming to lift away the grime that regular dusting leaves behind, all without soaking the wood or hurting the finish.
Start by clearing everything off the surface. Next, take your wood-safe cleaner and a soft, lint-free cloth and begin wiping. Always, always work in the direction of the wood grain. This little detail helps get the gunk out of the wood’s tiny natural crevices and prevents you from creating ugly cross-grain scratches.
As soon as you’re done with the damp cloth, grab a second, clean, dry one and go over the surface again. This two-step wipe-and-buff is the secret to a streak-free result and completely eliminates any risk of water damage.
Polishing with Professional Technique
Now that the surface is perfectly clean and dry, you’re ready to bring back that rich, warm glow. The key here is that a little bit of product goes a very long way.
Apply a small amount of your quality, silicone-free polish onto a clean, soft cloth—never squirt it directly onto the furniture. Putting it on the cloth first gives you total control and ensures you don't end up with a blotchy mess.
Work in small, manageable sections, rubbing the polish onto the surface. And again, follow the direction of the grain with long, even strokes. Let the polish sit for a few minutes (check the product instructions) so it has time to really penetrate the finish.
Finally, take a third clean, dry cloth and buff the surface to a brilliant shine. Use circular motions to wipe away any excess and bring out the wood’s natural depth. The final surface should feel silky smooth and clean, not greasy or tacky.
A Word of Caution: If you're working with antiques, you have to be extra careful. Many have delicate shellac or varnish finishes. Avoid any product with harsh solvents and always test your cleaner or polish on a small, hidden spot first to make sure it doesn’t cause any damage.
The specific methods you use can make all the difference. For more hands-on advice, this complete guide to cleaning teak wood has some fantastic insights that can apply to many different types of wood.
Think of this seasonal ritual as your chance to reconnect with your furniture, giving it the deep-down care it needs to thrive. Feeling inspired to find a piece worthy of this loving attention? Explore our stunning collection of living room furniture and discover the next timeless centerpiece for your home.
Solving Common Wood Furniture Problems
Life happens. Even when you're careful, a forgotten glass can leave a ghostly white ring, or an accidental slip can create a frustrating scratch. But don't see these as disasters. Think of them as opportunities to become your furniture's hero. You have the power to fix these common issues, and this guide will show you exactly how.
This is your first-aid kit for everyday furniture mishaps. We'll walk through proven methods for restoring your pieces, giving you the confidence to handle everything from minor scuffs to sticky residue. You'll learn to spot the difference between a simple DIY fix and a deeper gouge that might need a professional's touch.
Knowing how to care for wood furniture is a genuinely valuable skill. It's no secret people are investing more in quality, long-lasting pieces. The U.S. market alone is seeing a steady 4.6% growth rate, which tells us one thing: we all need to know how to protect these beautiful investments in our homes.

Conquering Water Rings And Minor Scratches
Let's start with the most common culprit: the dreaded white water ring. This happens when moisture gets trapped in the top layer of the finish, not in the wood itself. The good news? It's often surprisingly easy for you to fix.
- The Iron Method: Grab a clean, dry cotton cloth (like an old t-shirt with no screen printing) and place it over the ring. Set a dry iron to its lowest setting—no steam—and press it on the cloth for just a few seconds. Lift everything up to check your progress. The gentle heat helps evaporate that trapped moisture. Repeat this little dance until the ring vanishes.
- The Mayonnaise Trick: It sounds strange, but it works. The oils in full-fat mayonnaise can actually displace the moisture. Dab a small amount on the ring, let it sit for a few hours (or even overnight), then wipe it clean and buff the area.
For light surface scratches that haven't broken through the stain, you have a few options. One of the best old-school tricks is to simply rub the meat of a walnut or pecan over the scratch. The natural oils can darken the scuff just enough to make it blend in seamlessly.
If you want to get ahead of these issues, you can find more great strategies in our guide on how to protect wood furniture from scratches and stains.
Tackling Sticky Residue And Deeper Damage
From sticker residue left by kids to the gummy buildup from old polish, sticky spots are a real nuisance. Resist the urge to scrape them off, as that will almost certainly damage the finish.
Instead, dampen a cloth with a bit of mineral spirits or a citrus-based cleaner to gently dissolve the gunk. Always test it on a hidden spot first, like the back of a table leg, just to be safe.
Deeper scratches or gouges that show the bare wood underneath are a bit more involved. This is where touch-up markers and wax filler sticks become your best friends. These come in all sorts of wood tones, letting you fill in the damage and restore the color pretty effectively.
Expert Insight: When you're using a filler stick, always choose a color that's slightly lighter than your furniture. You can always darken it with a touch-up marker afterward, but it's much harder to lighten a repair that's too dark from the start.
While you're fixing visible damage, it's also smart to keep an eye out for less obvious problems. For instance, knowing about identifying termite damage can help you protect your wood pieces from hidden threats that can cause real structural harm.
Knowing When To Call For Backup
True confidence comes not just from knowing how to fix things, but also from recognizing when a job is best left to a professional. Some repairs are just too risky to tackle without experience.
This table breaks down some common scenarios and when it's time to pick up the phone.
DIY Wood Furniture Repair Solutions
| Problem | Your DIY Solution | When to Call a Professional |
|---|---|---|
| White Water Rings | Use the iron method or mayonnaise. | If the ring is dark, which means moisture has penetrated the wood. |
| Light Scratches | Try a walnut or a touch-up marker. | If the scratch is deep, wide, or part of a complex veneer. |
| Sticky Spots | Use mineral spirits or a citrus cleaner. | If the residue is old, hardened wax that refuses to lift easily. |
| Loose Joints | Apply wood glue and clamp the joint. | If the piece has structural damage, like a completely broken leg. |
With these tips, you should feel much more prepared to handle the little bumps and bruises your furniture will inevitably face. Knowing you can handle these repairs yourself is a great feeling.
Protecting Furniture from its Environment
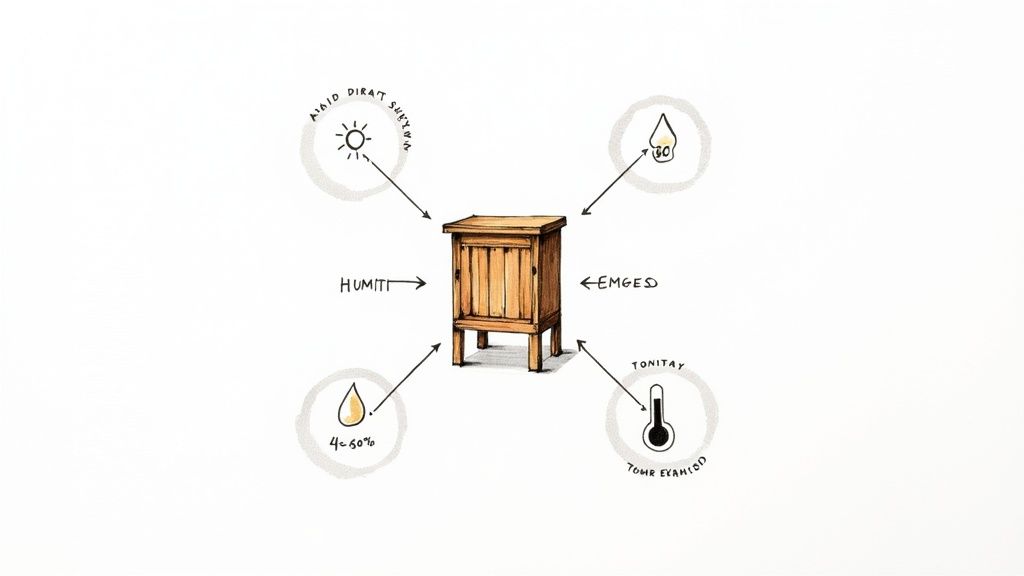
Some of the biggest threats to your wood furniture are completely invisible. Ambient factors like sunlight, humidity, and temperature shifts can silently cause more damage over time than a dozen accidental spills. Getting a handle on your home's environment is the ultimate pro-level move, transforming you from someone who simply maintains furniture into someone who truly preserves it for the next generation.
This is where you can stop problems like cracking, warping, and fading before they even start. It’s all about creating a safe haven where your cherished pieces can thrive.
Mastering Indoor Humidity Levels
It helps to think of wood as a living, breathing material. It’s hygroscopic—a fancy way of saying it naturally absorbs and releases moisture to match the air around it. When the air is dry, wood gives up its moisture and contracts. When it's humid, it soaks up moisture and expands.
This constant, subtle movement is what eventually causes joints to loosen, veneers to lift, or solid wood tops to crack. Here in West Texas and Southeastern New Mexico, we deal with incredibly dry air, which puts our furniture at an even higher risk of shrinking and cracking.
The goal is stability. Your ideal indoor relative humidity for wood furniture is between 40% and 45%. This "sweet spot" minimizes that natural expansion and contraction, keeping the wood stable and stress-free.
Fortunately, you have some powerful tools to help you dial this in:
- During Dry Seasons: A humidifier is your best friend. Running one in your main living areas adds much-needed moisture back into the air, preventing wood from drying out too much.
- During Humid Seasons: Your air conditioner or a dedicated dehumidifier is essential. They pull that excess moisture from the air, stopping wood from swelling—the culprit behind sticky drawers and warped doors.
The Art of Strategic Furniture Placement
Where you put your furniture is just as critical as how you clean it. Direct sunlight and heat are two of the fastest ways to destroy a beautiful finish, turning a rich, vibrant piece into something faded and brittle.
Sunlight’s UV rays act like a slow-motion bleach. Over time, they break down the chemical bonds in the wood's finish and stain, causing the colors to fade unevenly. You’ve probably seen it before—a spot on a table where a lamp sat for years is noticeably darker than the sun-bleached wood around it.
Heat sources like radiators, fireplaces, or heating vents pose a different kind of threat. They create intense, localized dry spots that rapidly pull moisture out of the wood. This can lead to checking (those small surface-level cracks) or even cause significant, structural cracks to form.
Your mission is to position your furniture thoughtfully. Try to keep pieces at least a few feet away from direct heat sources. For furniture near windows, use curtains or blinds to diffuse that harsh afternoon sun. This simple act of strategic placement is one of the most powerful forms of preventative care you can practice.
Creating a Protective Physical Barrier
Beyond managing the room's atmosphere, simple physical barriers can save you from countless headaches. Think of this as creating a buffer between your furniture and the activities of daily life.
- Felt Pads: Stick them on the bottom of lamps, vases, and any decorative objects you place on your furniture. This is an easy fix that prevents countless scratches when things get moved or shifted.
- Coasters and Trivets: Make them a non-negotiable rule in your home. They are your frontline defense against the moisture rings and heat damage that come from hot dishes or cold, sweating glasses.
- Tablecloths and Placemats: Use them during meals or for messy activities like homework or crafts. They provide an excellent, full-coverage shield against spills, dents, and impacts.
These small habits protect the furniture's surface and create a complete ecosystem of care. Just as you protect your furniture, it's wise to consider how your furniture impacts its surroundings. You can learn more by reading our guide on how to protect your floors from your furniture, completing the circle of home protection.
Now you’re equipped to create the perfect environment for your wood pieces. Feeling ready to find a beautiful new piece for your expertly controlled home? Here’s how you can select the ideal bedroom furniture that will thrive under your care.
We Hear You: Answering Your Top Wood Furniture Care Questions
Even after you've learned the basics, real-world questions always pop up. It happens to everyone. Let's dig into some of the most common concerns we hear from folks just like you, so you can feel confident you're doing the right thing for your furniture.
How Often Should I Actually Polish My Furniture?
This is a great question because it's so easy to overdo it. When it comes to polish, more is definitely not better. In fact, over-polishing is a classic mistake that creates a sticky, hazy film on the surface, which ironically ends up attracting more dust.
For most wood furniture, a good polish is only needed every three to six months. Think of it as a deep conditioning treatment you provide, not a daily cleaning spray. For your regular weekly dusting, all you need is a dry microfiber cloth to get rid of any abrasive dust particles. You'll know it's time to polish when the wood starts to look a bit thirsty or lackluster. Otherwise, trust us—less is more.
Can I Just Use My All-Purpose Kitchen Spray on My Wood Table?
Please don't! We strongly advise against it, and for a very good reason. Those all-purpose cleaners are designed to be aggressive grease-cutters, often packed with ammonia or harsh detergents. When you spray that on a wood finish, it does the same thing: it starts to strip away the protective top coat.
Using these cleaners will, over time, make your finish look dull and cloudy. Worse, it can eventually dry out the wood itself, leaving it vulnerable to cracks and other damage. Stick with a pH-neutral cleaner made specifically for wood. For a quick cleanup (like after dinner), a cloth lightly dampened with water and maybe a single drop of mild dish soap is fine—as long as you wipe it completely dry right after.
Expert Insight: This is especially true for antiques. Many older pieces have delicate shellac or lacquer finishes that can be permanently damaged by modern, harsh chemicals. Your simple, gentle approach is always the safest bet for preserving the character and value of older furniture.
What’s the Best Way to Get Rid of Old, Gummy Wax Buildup?
There's nothing more satisfying than removing years of old, discolored wax to reveal the beautiful wood underneath. You can safely tackle this with mineral spirits, but you need to do it carefully.
- Get Some Air: First things first, open a window or work in a well-ventilated space. And definitely wear protective gloves.
- Do a Patch Test: Never pour mineral spirits directly on the wood. Dampen a clean, soft rag with it, then find a hidden spot—like the inside of a table leg—to test it out. You're just making sure it doesn't react badly with the finish.
- Go With the Grain: If the test spot looks good, you're ready to go. Gently rub the cloth in small sections, always moving in the same direction as the wood grain. You’ll start to see the gunk and old wax lift right off onto your cloth.
- Wipe it Clean: Use a second, clean cloth to wipe off any remaining residue. Let the surface air dry completely.
- Add Protection: Now that the surface is clean, it needs to be protected. Apply a very thin, fresh coat of a quality, silicone-free polish to restore its natural sheen and seal the finish.
How Do I Keep My Dining Table from Getting Destroyed by Heat and Scratches?
Your dining table is the workhorse of your home, so protecting it is all about creating barriers between the wood and the realities of daily life.
- Placemats & Coasters Are Non-Negotiable: This is the single most important habit you can get into. Every plate, every glass, every time.
- Trivets Are Your Best Friend: A hot casserole dish placed directly on wood can create those dreaded white heat rings in an instant. Always, always use trivets or hot pads.
- Use Felt Pads: Stick little felt pads on the bottom of everything that sits on your table—vases, salt and pepper shakers, you name it. This tiny step prevents a lifetime of small scratches.
- Lift, Don't Drag: Make it a family rule. When you need to move something on the table, lift it up instead of sliding it across the surface.
- Bring in Reinforcements: For big family dinners, holidays, or when the kids break out the craft supplies, a custom table pad or even a thick tablecloth provides foolproof, full-coverage protection.
When you know how to handle these situations, you become the best caretaker for your furniture's future.
At Miller Waldrop Furniture & Decor, we believe that a beautiful home is built on quality pieces and the knowledge to care for them. If these tips have empowered you to find your next family heirloom, we invite you to explore our stunning collections. Let our experts help you choose the perfect fit for your home, and discover furniture worth preserving at https://www.millerwaldrop.com.